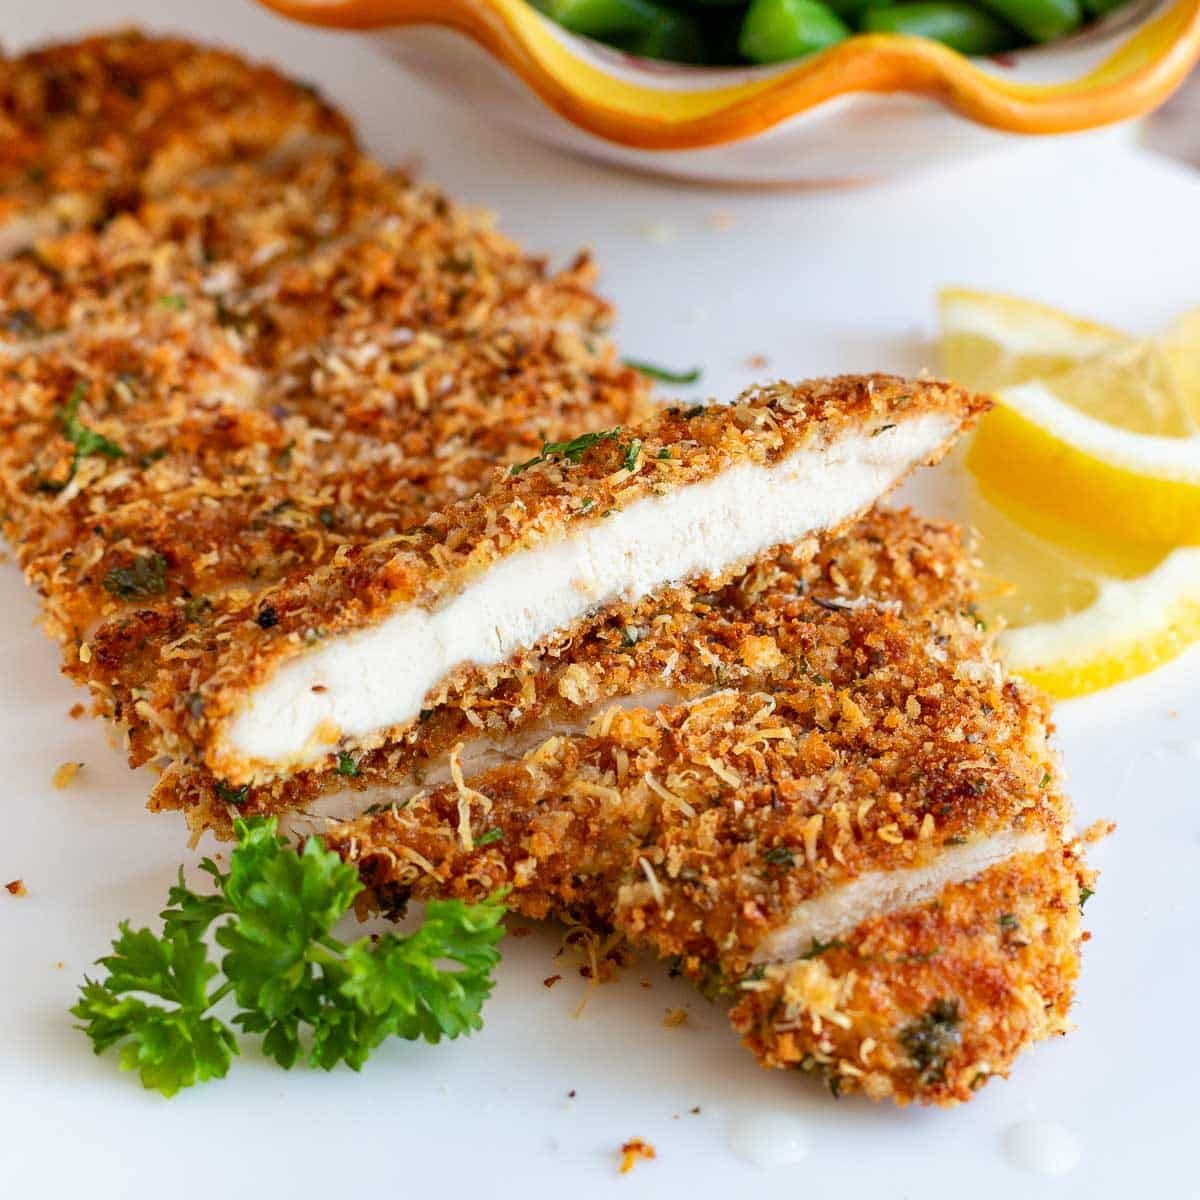
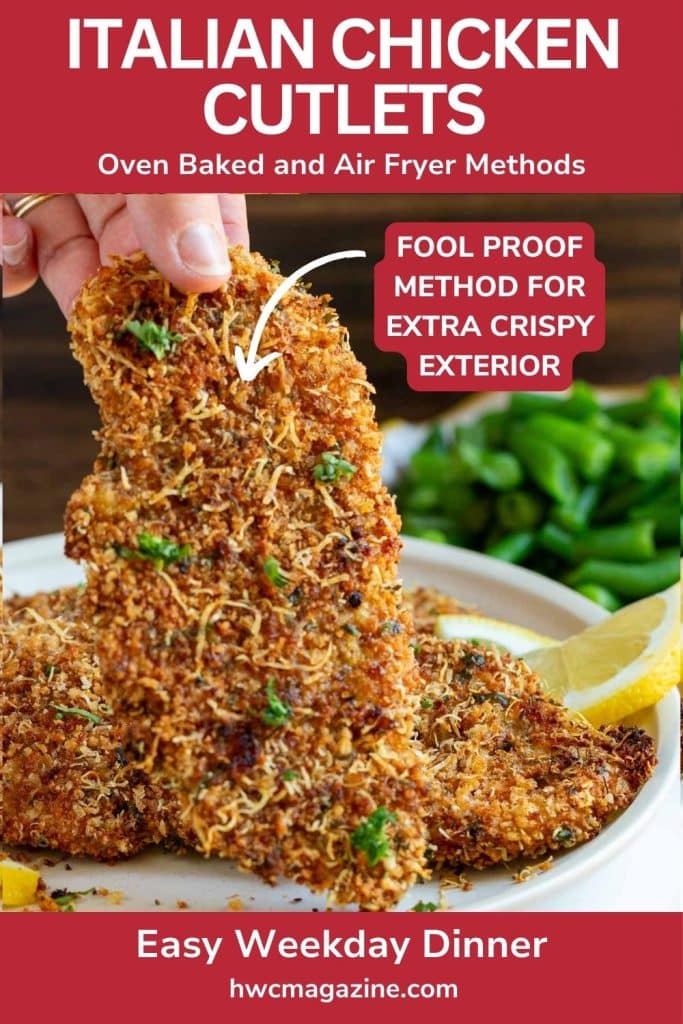
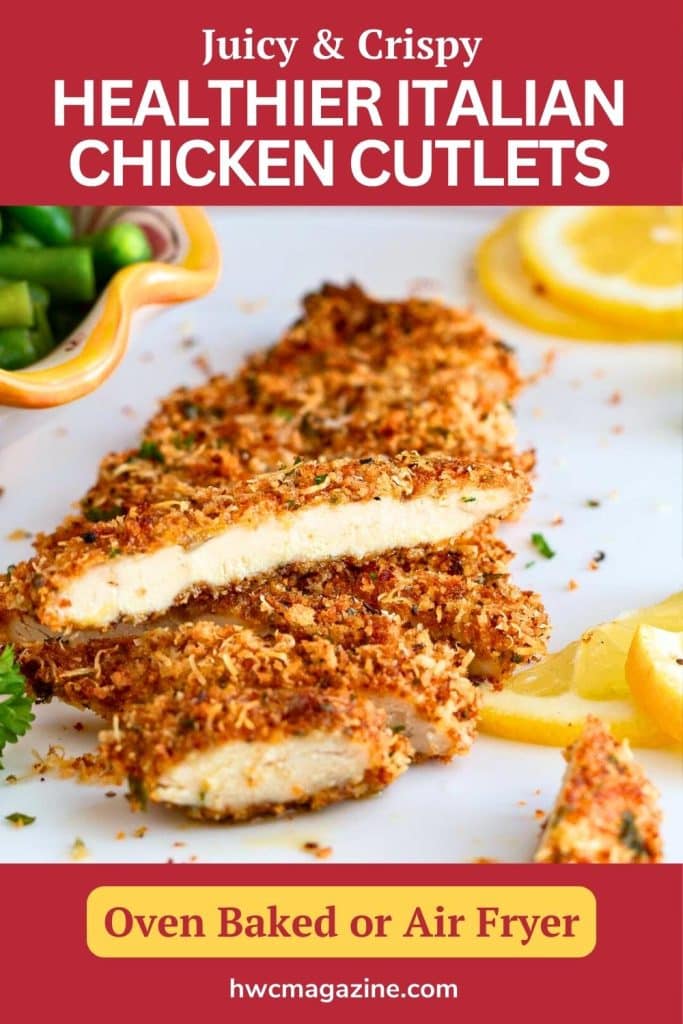
These oven-baked or air-fried Italian Chicken Cutlets deliver a delightfully crispy exterior and juicy, flavorful interior. Our foolproof technique of toasting the panko breadcrumbs before cooking ensures a perfectly crisp crust without drying out the chicken.
Jump to:
- Baked or Air Fried
- Make in Advance
- Ingredients
- Preparing the Breading Station
- How to Make Italian Chicken Cutlets?
- How to Bake?
- How to Air Fry?
- Recipe Tips
- Air Fryer Method: Pros and Cons
- Baking Method: Pros and Cons
- What to Serve with Chicken Cutlets?
- More Easy Chicken Recipes
- Italian Chicken Cutlets (Oven Baked or Air Fried)
Baked or Air Fried
Enjoy these versatile Italian-style cutlets in a variety of ways - on a hearty sandwich, atop a fresh salad, or as the base for classic Chicken Parmesan. With a healthy cooking method and mouthwatering texture, this easy recipe is sure to become a new family favorite.
Say goodbye to the mess (AKA cleaning the grease and grime off everything – uggh!) and extra calories of shallow or deep frying on the stovetop. Instead, these cutlets can be quickly baked in the oven or cooked in the air fryer for a healthier, easier-to-clean option. Both cooking options are included in the recipe card below.
Make in Advance
And the best part? They can be made ahead and frozen for effortless meal prep. With their amazing texture, flavor, and convenience, these Italian style chicken cutlets are sure to become a new family favorite. Let's get started on the recipe!
Ingredients
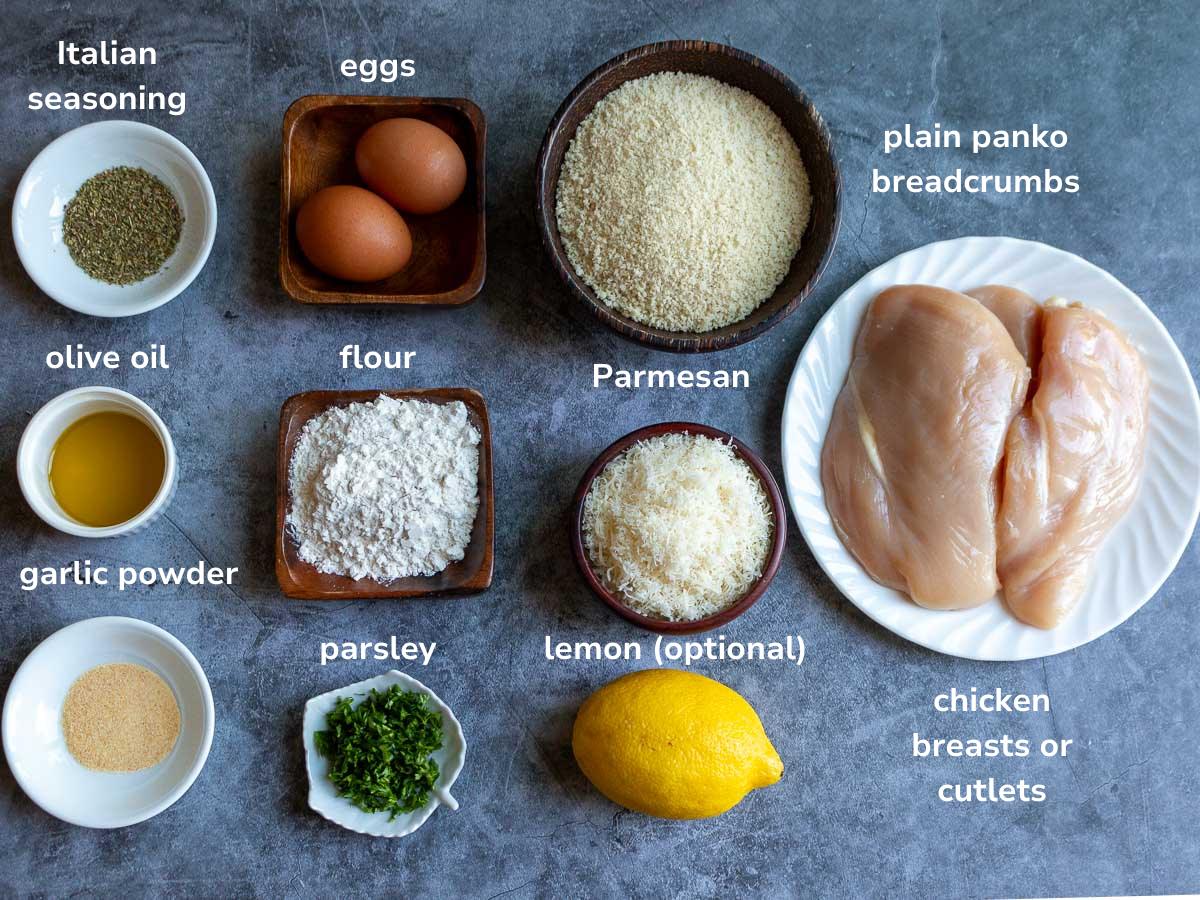
Chicken – We used boneless skinless chicken breasts and sliced them into cutlets. Cutlets are essentially just chicken breasts that have been sliced in half lengthwise to make them thinner just like we did with out mushroom chicken recipe. Chicken breast cutlets are a more budget friendly option. If you want to save time, you can use pre-cut chicken cutlets.
Plain Panko breadcrumbs (Japanese breadcrumbs) – These make the cutlets extra light and crunchy because they are made from white bread without the crusts and are grated before dried. Regular Italian breadcrumbs are heavier and will not give you the same level of crunchiness. For dietary issues you may want to use gluten-free panko breadcrumbs like we breaded our stuffed zucchini blossoms with.
Eggs – helps hold the breading on the Italian chicken cutlets.
Flour – seals in the juices, helps the egg bind to the chicken which in turn helps the panko breadcrumbs stick. We used all-purpose flour. If you have dietary issues, you can substitute with a gluten-free flour blend.
Olive Oil – but of course, right!
Italian Seasoning Blend – this is a spice mixture of basil, oregano, rosemary, marjoram, and thyme. The addition of Italian seasoning and parmesan cheese is what makes this recipe for Italian chicken cutlets different from Japanese chicken or pork tonkatsu.
Garlic – kept it easy with garlic powder or can use freshly minced garlic.
Parsley – nice to garnish with - but not required.
Parmesan Cheese – finely grated – the king of cheese! We use most of the cheese in the panko bread crumb mixture but also use a little in the egg mixture. Double the flavor. If you love the flavor of parmesan cheese but are looking for a low carb recipe, you are going to love our herb crusted beef cutlet recipe.
Preparing the Breading Station
*For the full Italian chicken cutlet recipe instructions, see the recipe card below.
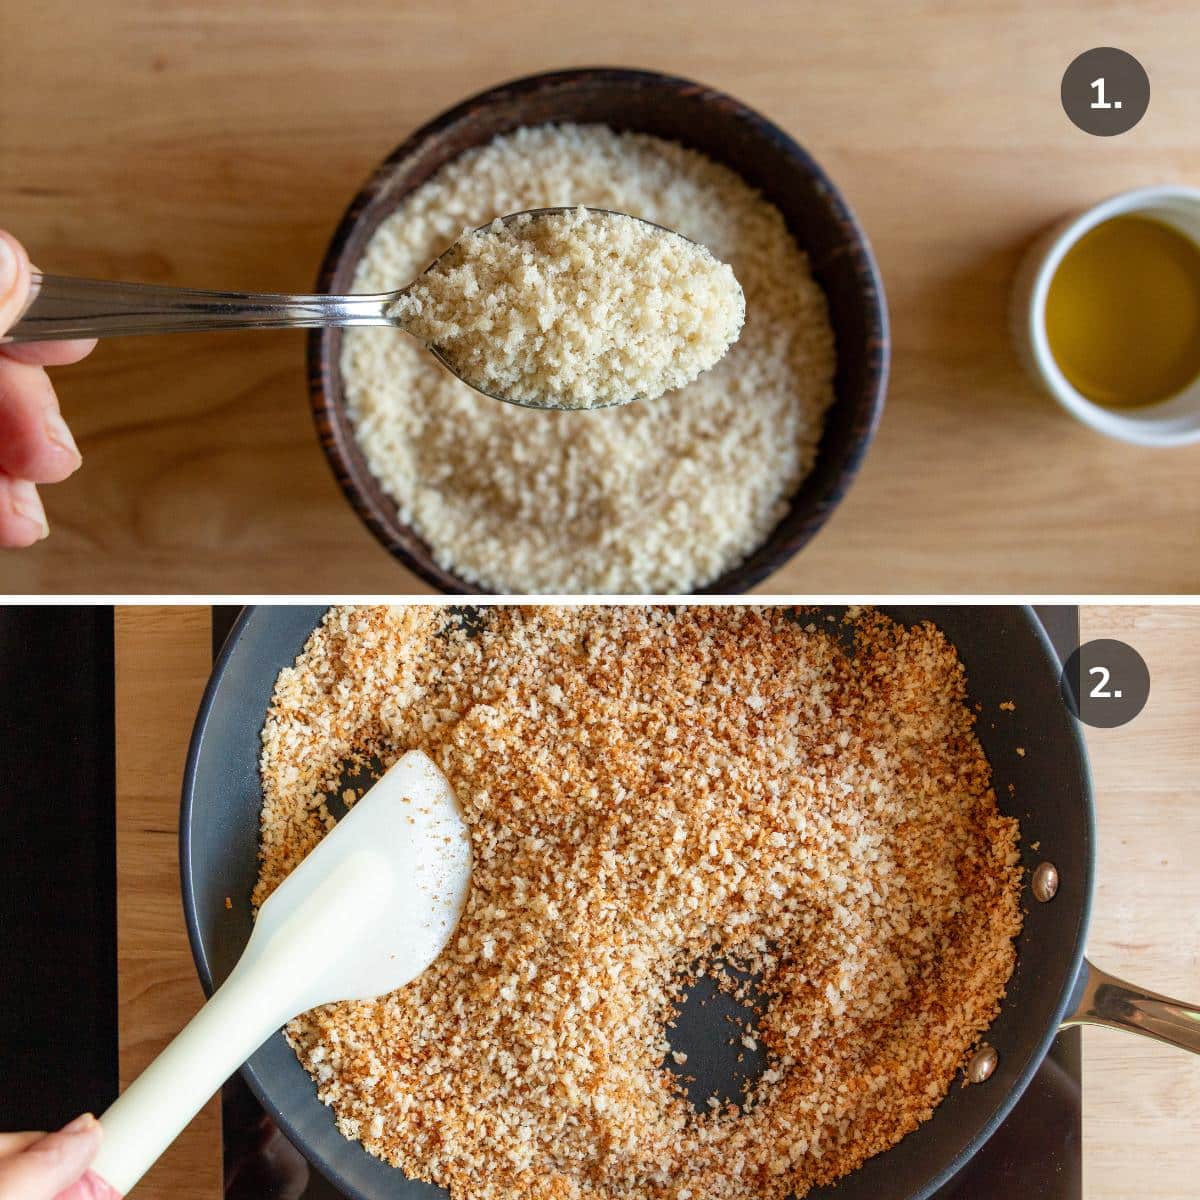
- Toast panko breadcrumbs with olive oil in a pan until lightly browned. Set aside to cool.
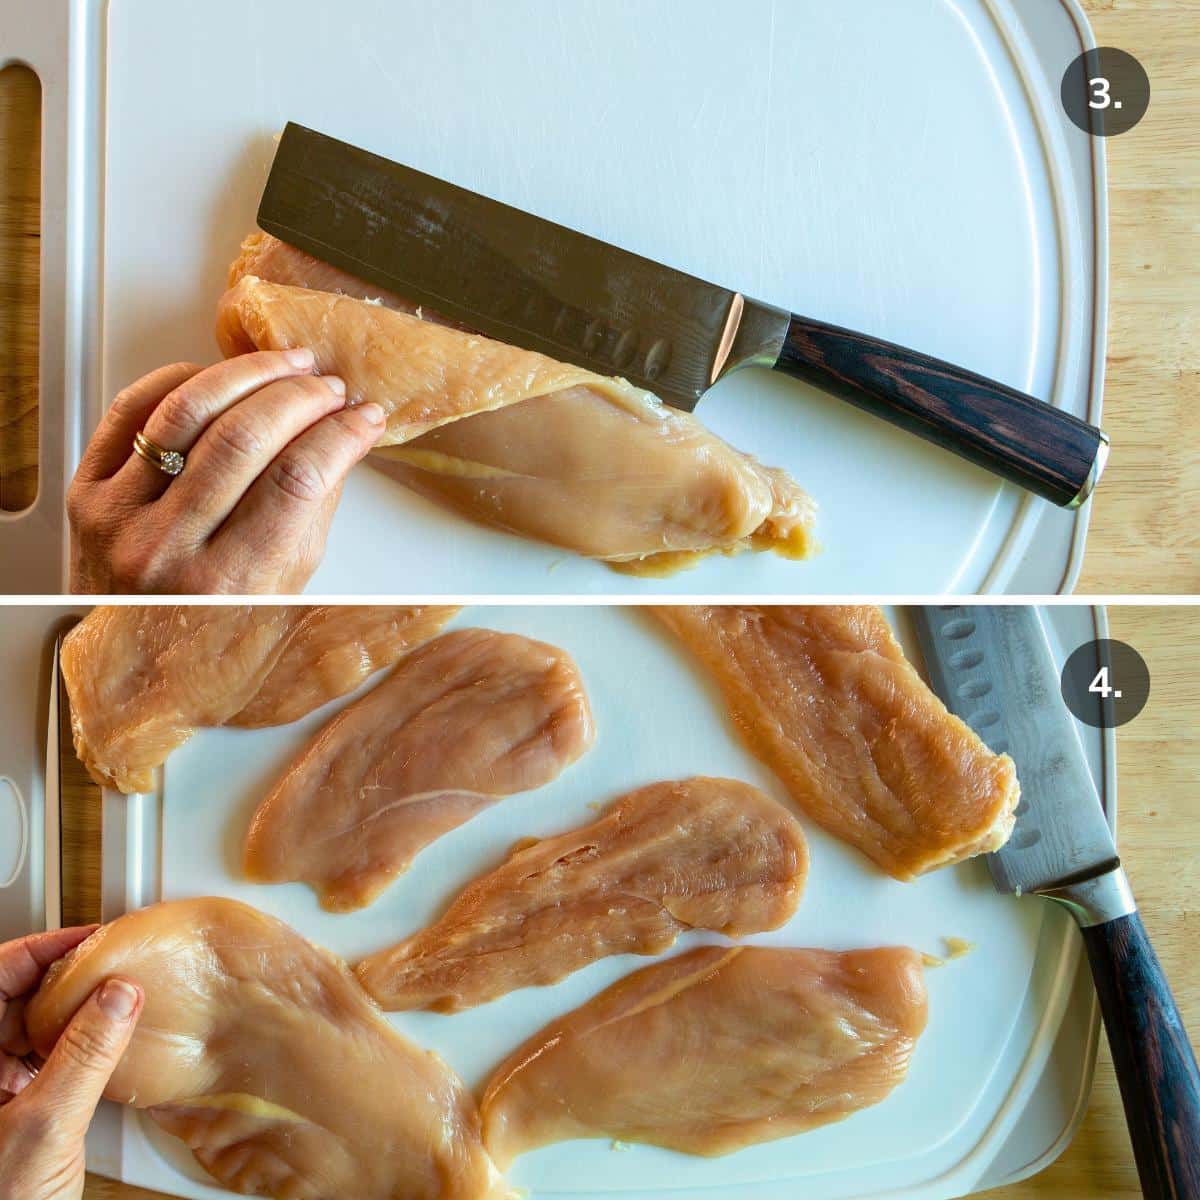
- Butterfly or slice chicken breast down the center lengthwise to make thin cutlets.
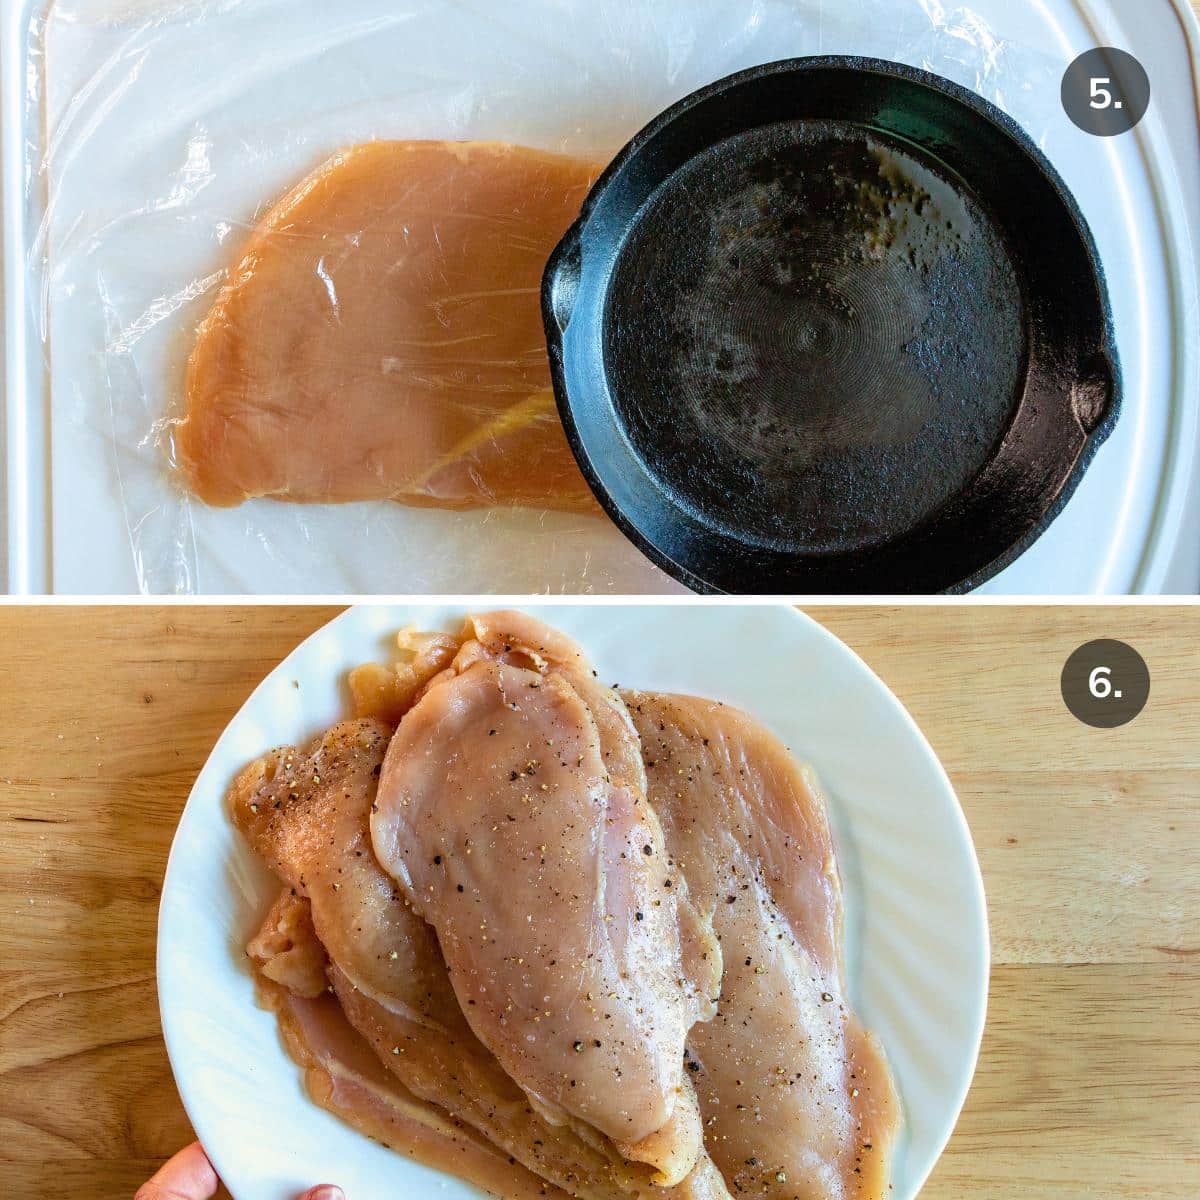
- Pound chicken cutlets with a meat mallet or a heavy skillet to flatten to about ¼ inch thickness.
- Season chicken cutlets
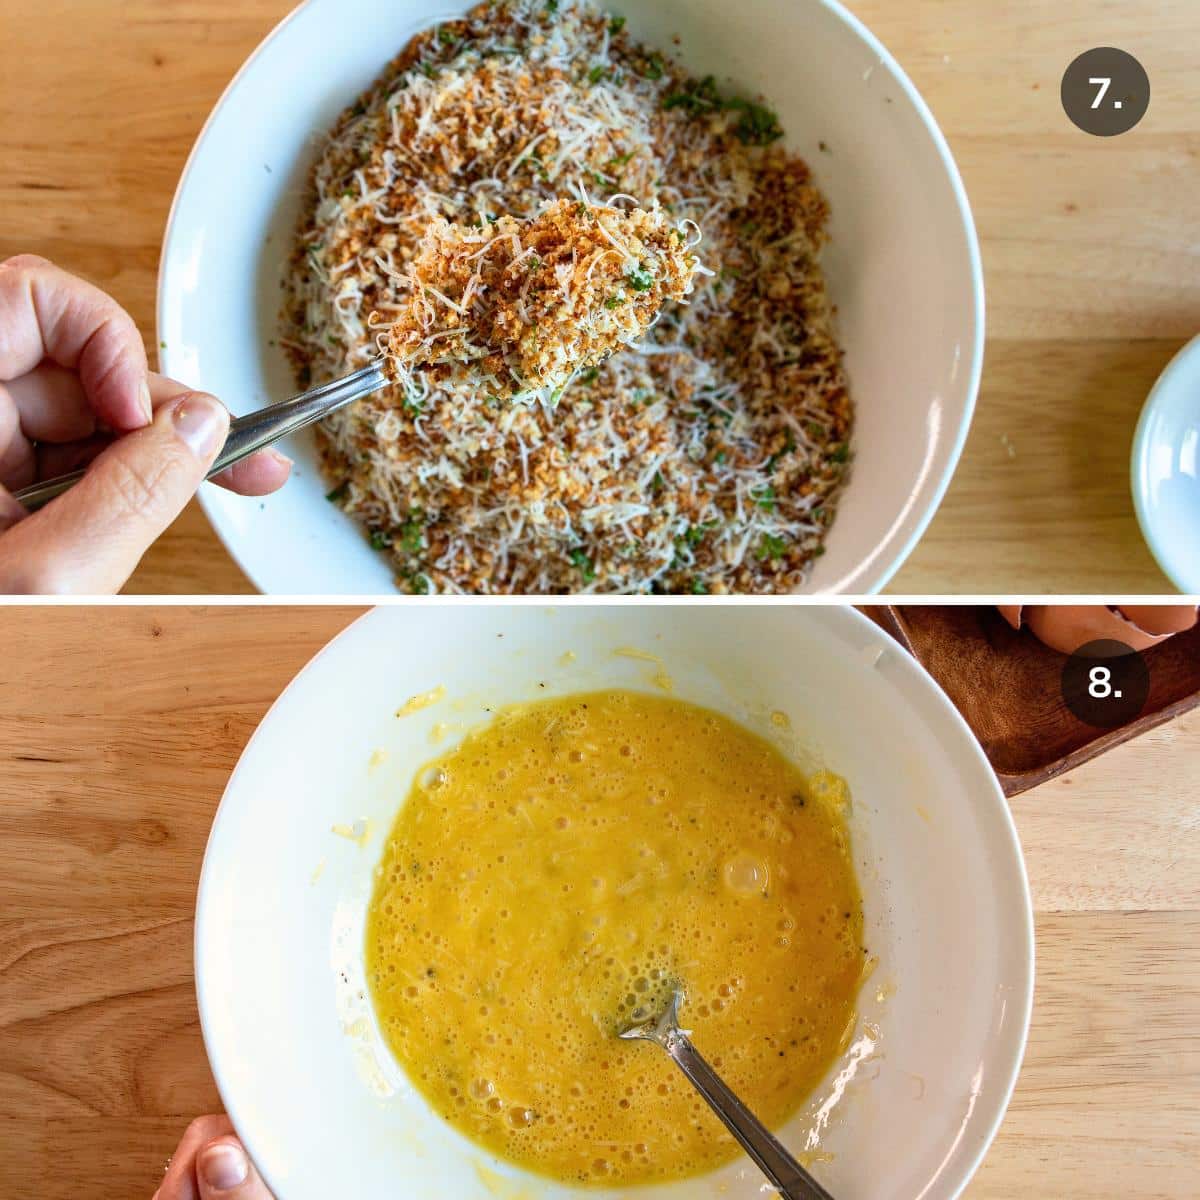
- Mix parmesan cheese, Italian seasoning, garlic powder, parsley, and salt and pepper in the toasted panko breadcrumbs.
- Beat eggs and add the rest of the parmesan cheese and salt and pepper. Set it aside.
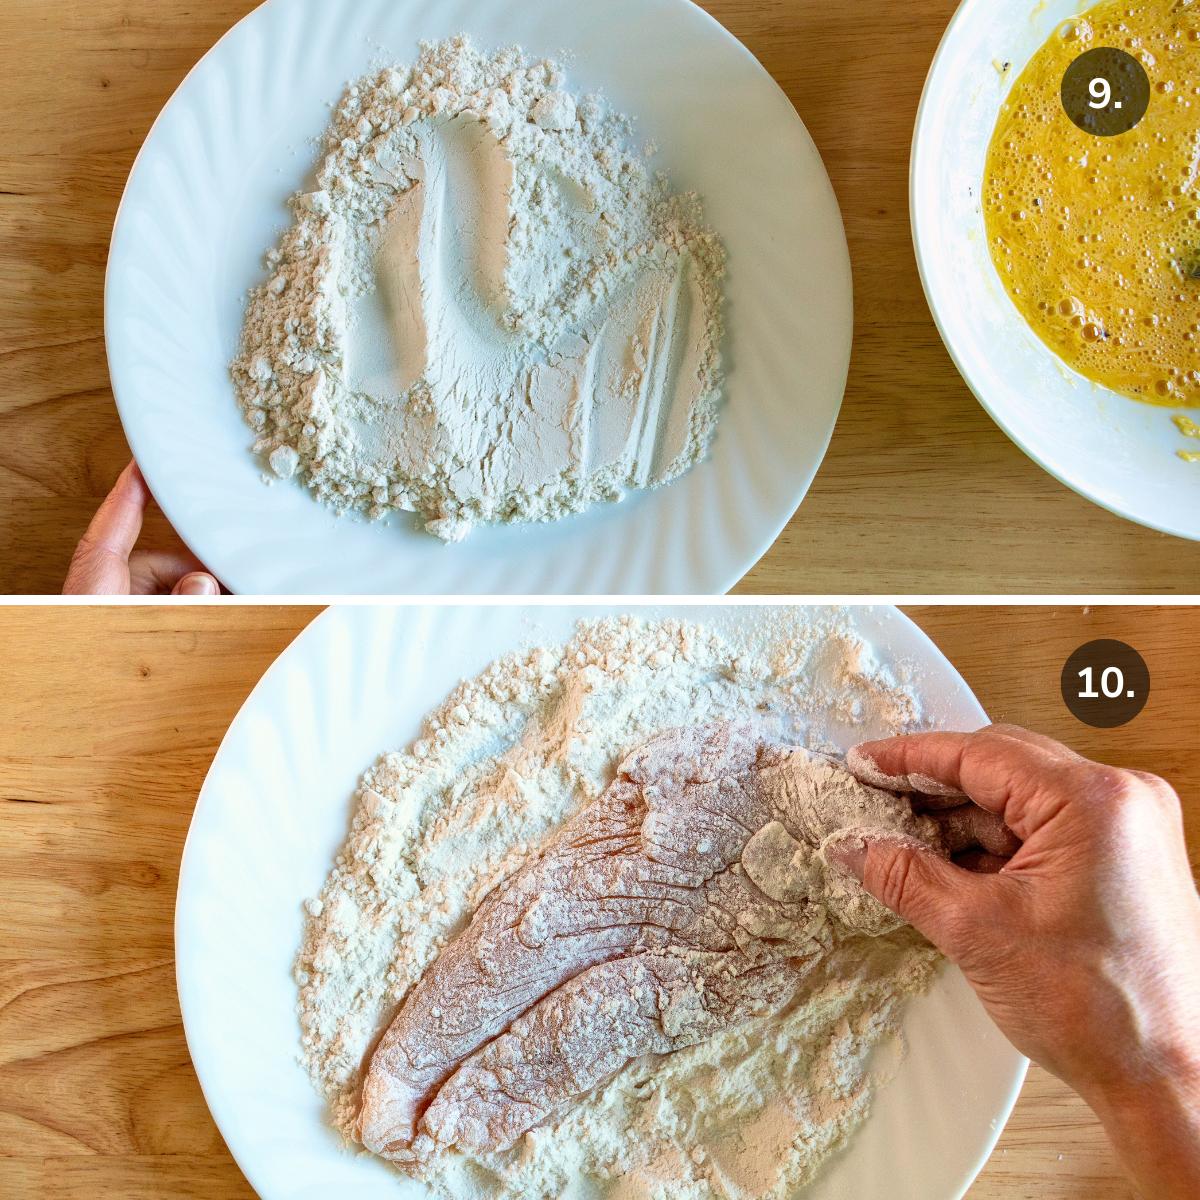
- Place flour on a plate and set up your breading station.
How to Make Italian Chicken Cutlets?
- Dip the seasoned chicken cutlets into the flour and shake lightly to remove excess flour.
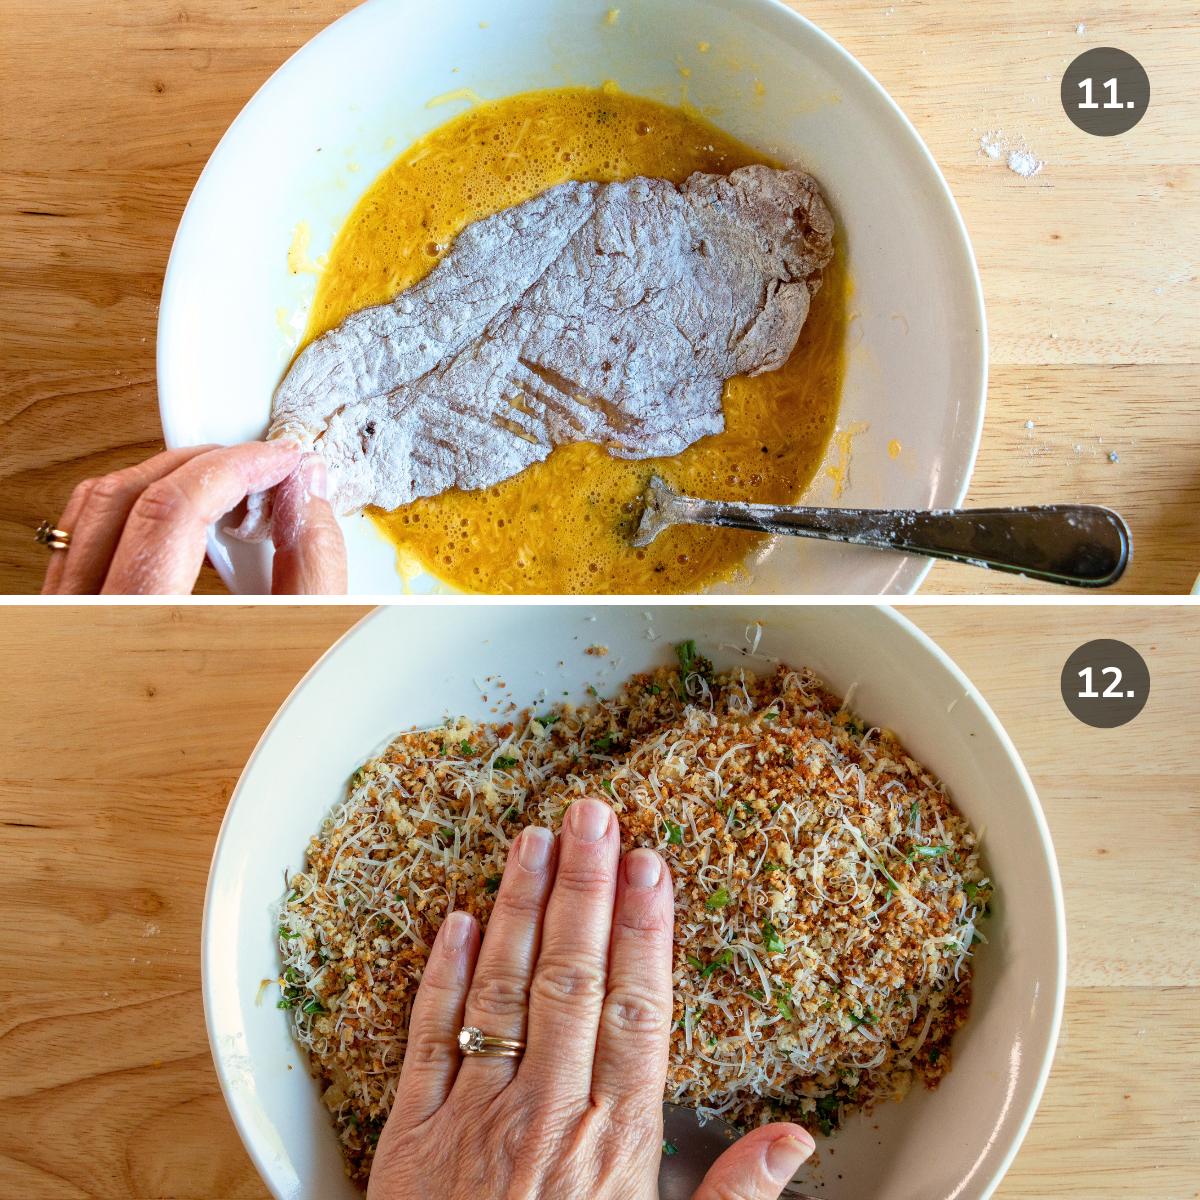
- Next, dip the floured chicken piece into the egg mixture to coat both sides.
- Transfer the coated chicken onto the plate of seasoned toasted breadcrumbs. Coat both sides and press lightly to ensure the breading sticks to the chicken.
- Prepare to either air fry or bake.
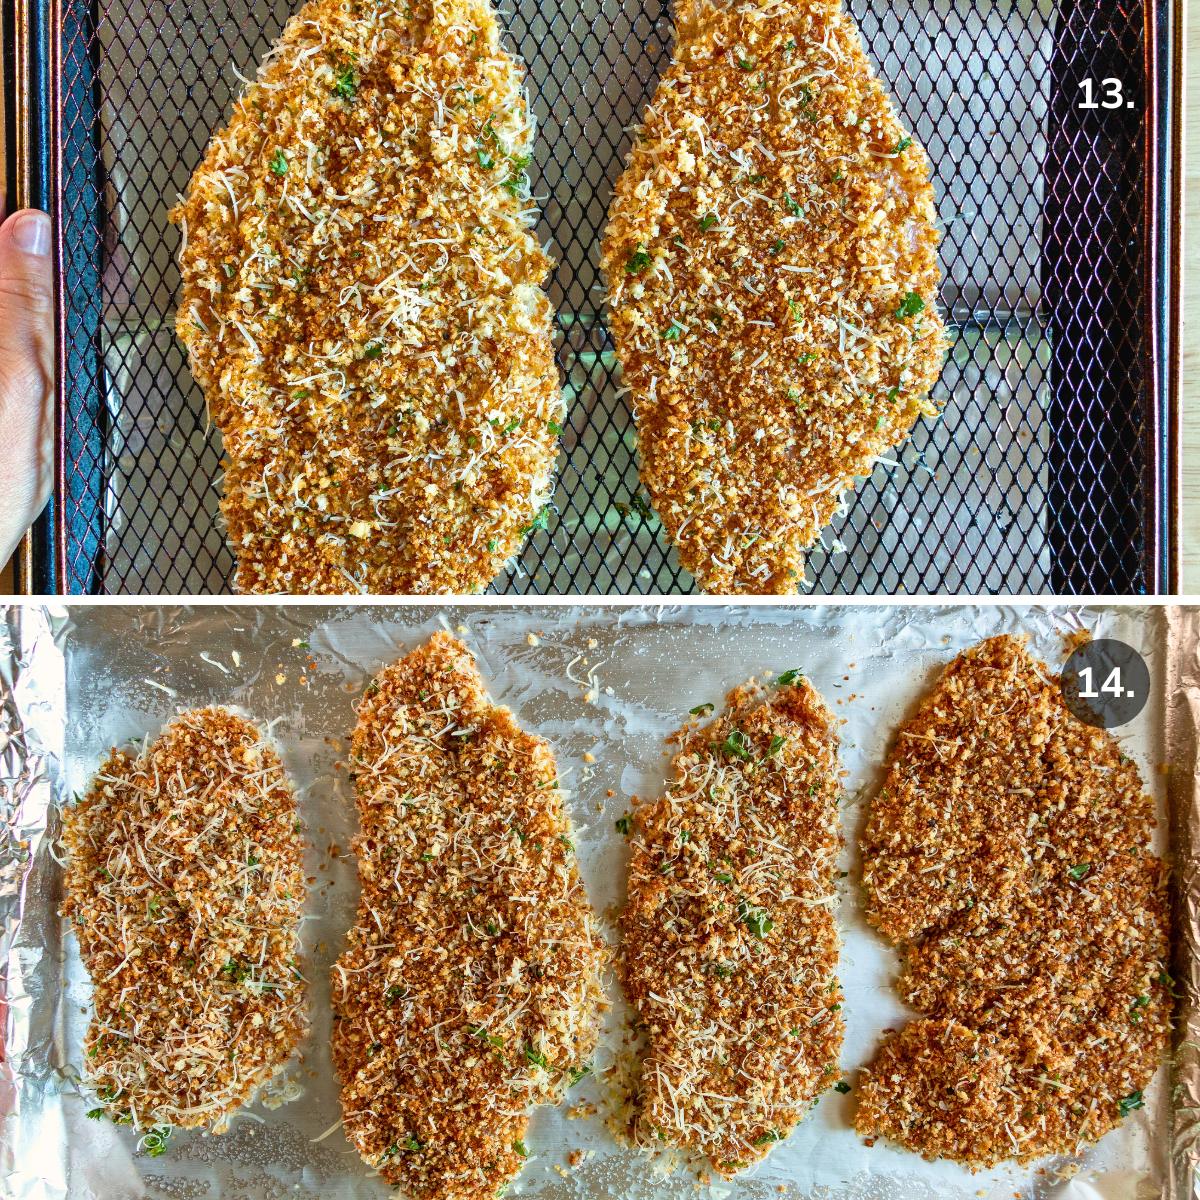
Recipe Tip: Our foolproof method of toasting the panko breadcrumbs BEFORE baking or air frying is the secret to juicy chicken. Now, you don’t have to overcook the chicken just to get your breadcrumbs brown, toasty and crispy because they already are!
How to Bake?
- Preheat oven to 400° F (204°C)
- Place Italian chicken cutlets on a lined and lightly greased baking sheet and bake for 15 minutes. Then, turn over and continue baking for another 5 to 10 minutes or until the chicken has reached the internal temperature of 165°F (73.9°C).
How to Air Fry?
- Preheat air fryer to 400° F (204°C)
- Place Italian chicken cutlets in the lightly greased air fryer basket and spray with oil. Air fry for 5 minutes. Then flip the chicken over and spray the other side with oil. Continue to air fry for another 5 to 7 minutes (total of 10 - 15 minutes) or until the chicken has reached the internal temperature of 165°F (73.9°C).
Recipe Tip: Cook time will vary depending on how flat your chicken cutlets are. Thicker cutlets will take longer to cook than thinner cutlets.
Recipe Tips
- If using previously frozen chicken, make sure it is completely thawed before breading or it will be soggy.
- Season the chicken cutlets, egg mixture and the panko bread mixture thoroughly for the best tasting breaded chicken.
- Set up your breading station like the Ford assembly line! First goes the chicken, then the flour, followed by the egg mixture and then the panko bread crumb mixture. Lastly, have your lined baking tray or prepared air fryer basket ready at the end.
- Use a fork to bread the chicken or use one hand for breading and keep the other hand clean.
- Shake off the excess flour so that the egg and panko breadcrumbs adhere well to the chicken.
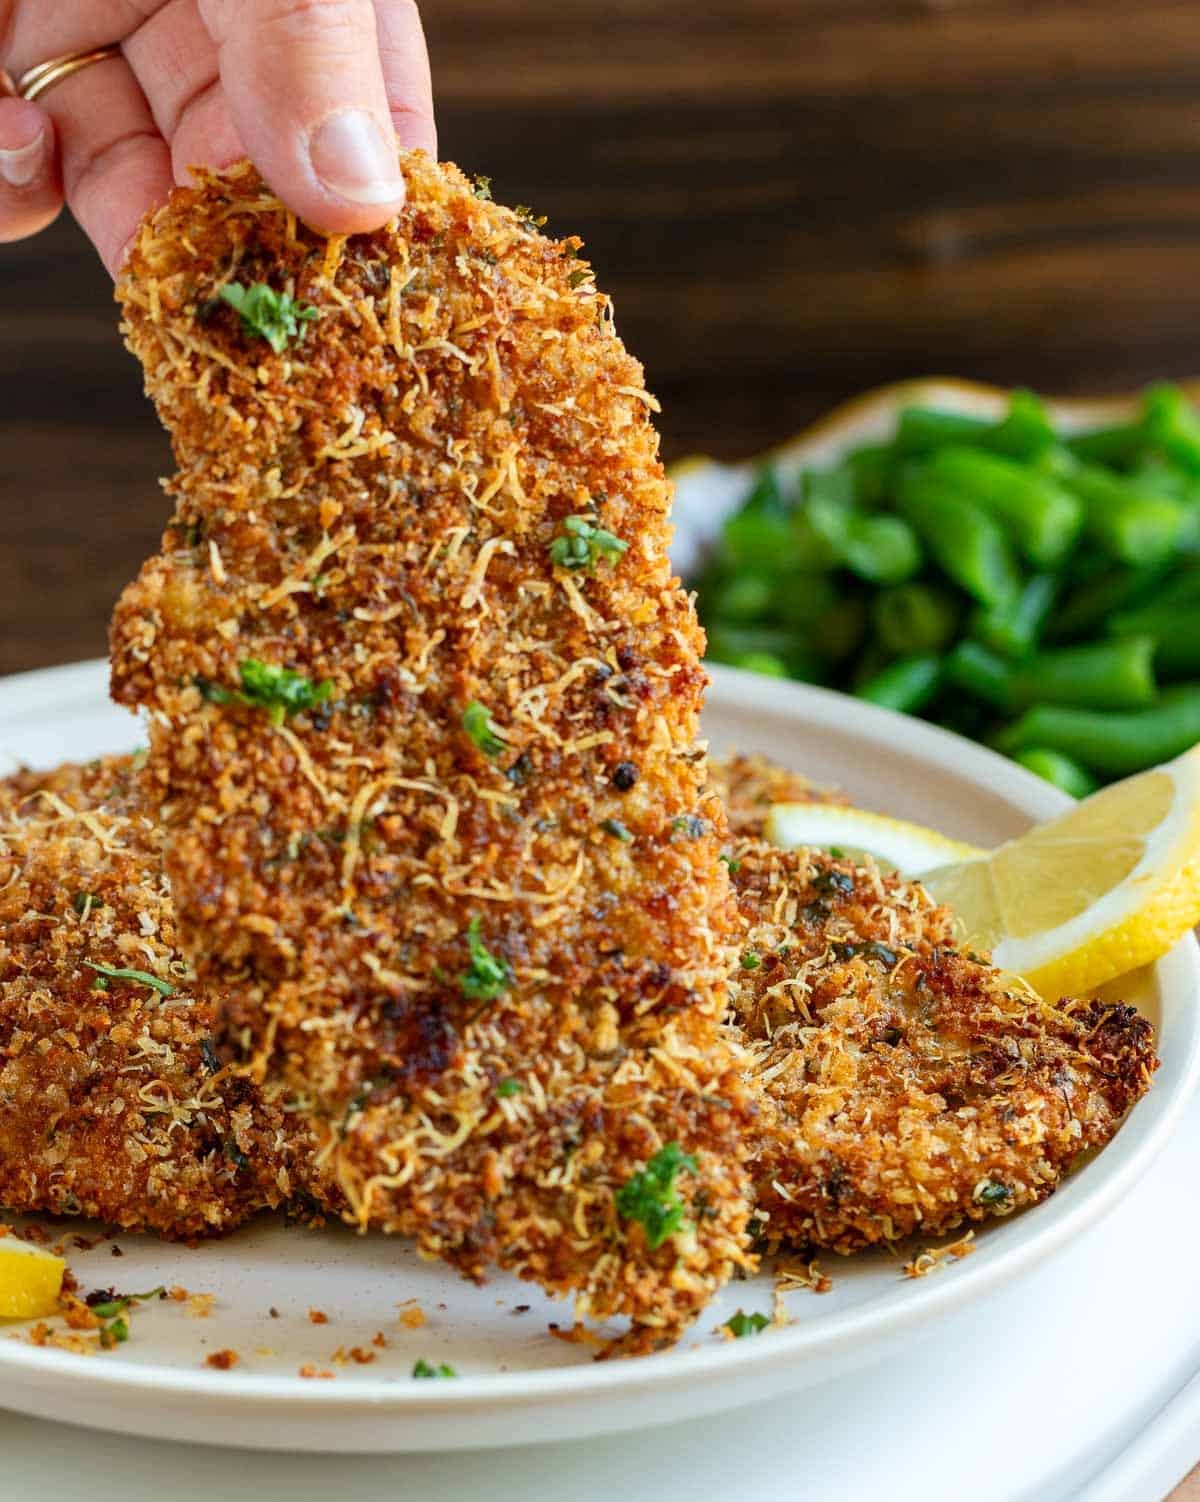
- After dipping the chicken into the panko breadcrumb mixture, press down firmly on both sides so the breadcrumb mixture adheres to the chicken cutlet.
- The goal is to pound the chicken to a ½ inch thickness all around the cutlet to make sure it cooks evenly.
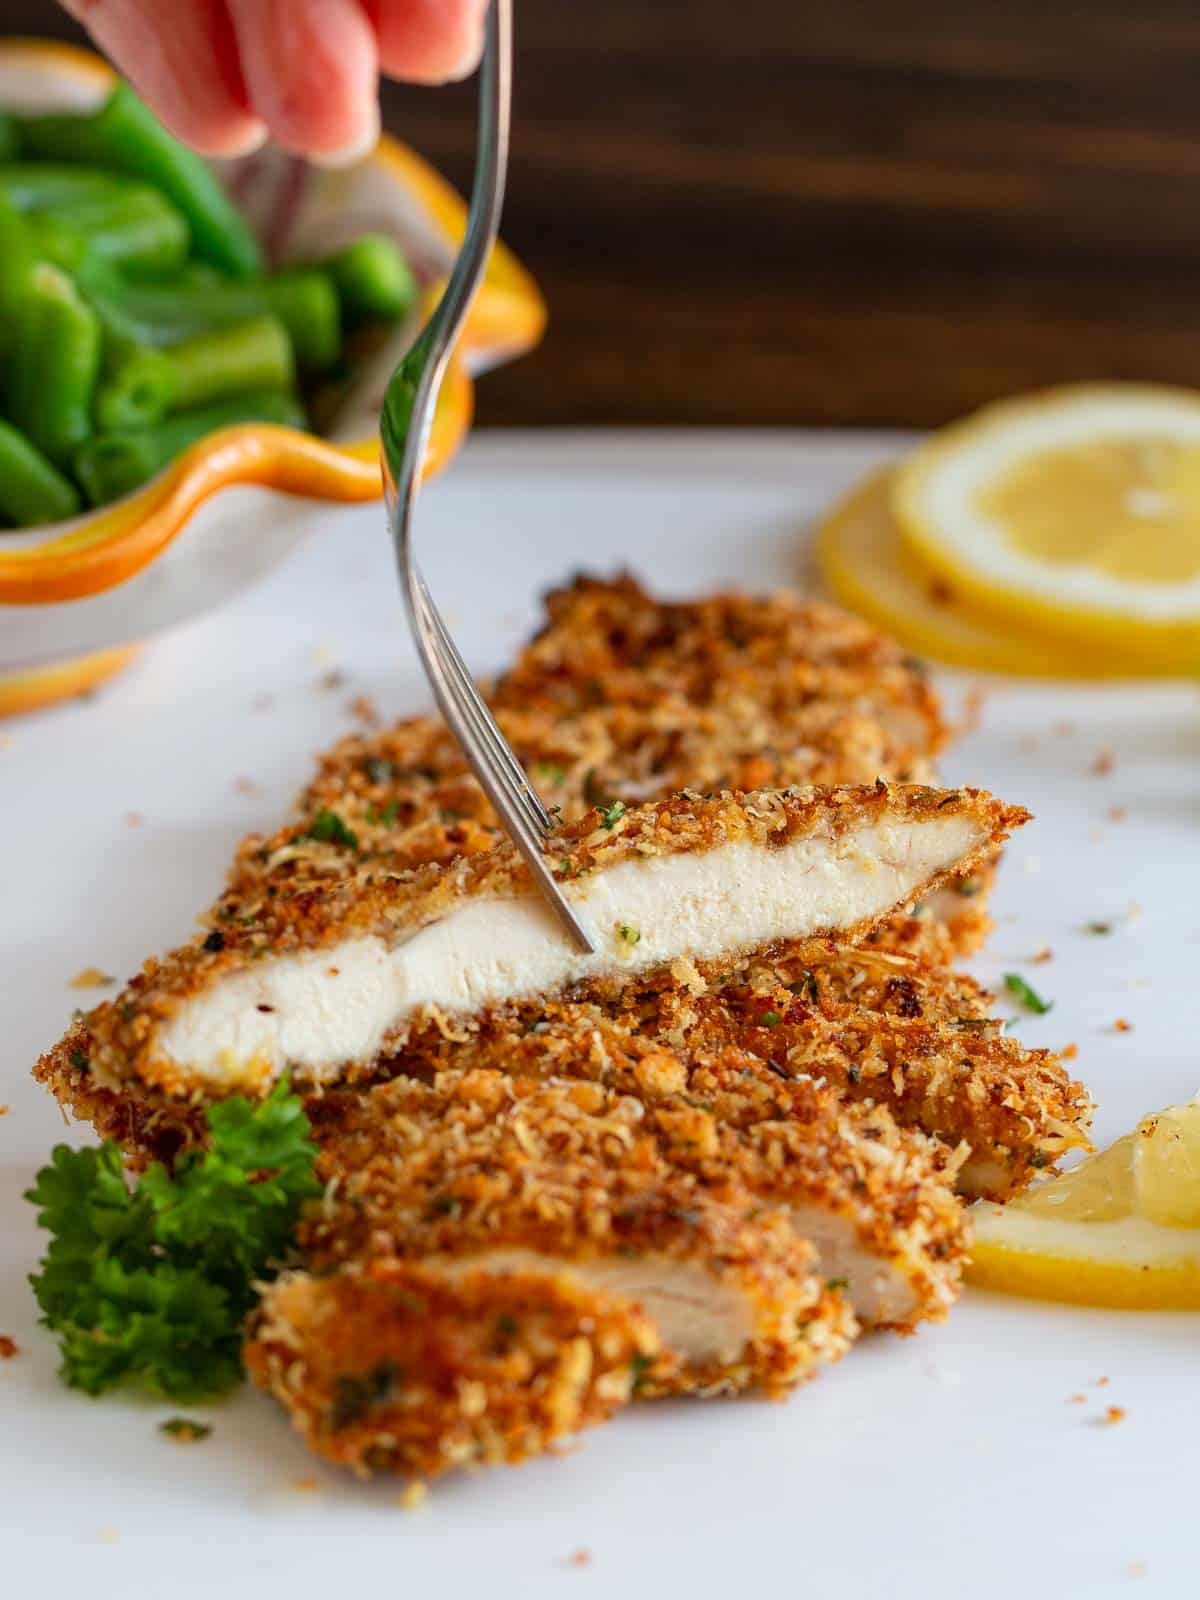
- Don’t overcook the chicken! You do not have to worry about the panko breadcrumbs getting browned or crispy because you already completed this task on the stove top. The goal is to have a moist chicken cutlet with an internal temperature of 165°F (73.9°C). For us, it took 20 minutes in the oven and 12 minutes in the air fryer.
Air Fryer Method: Pros and Cons
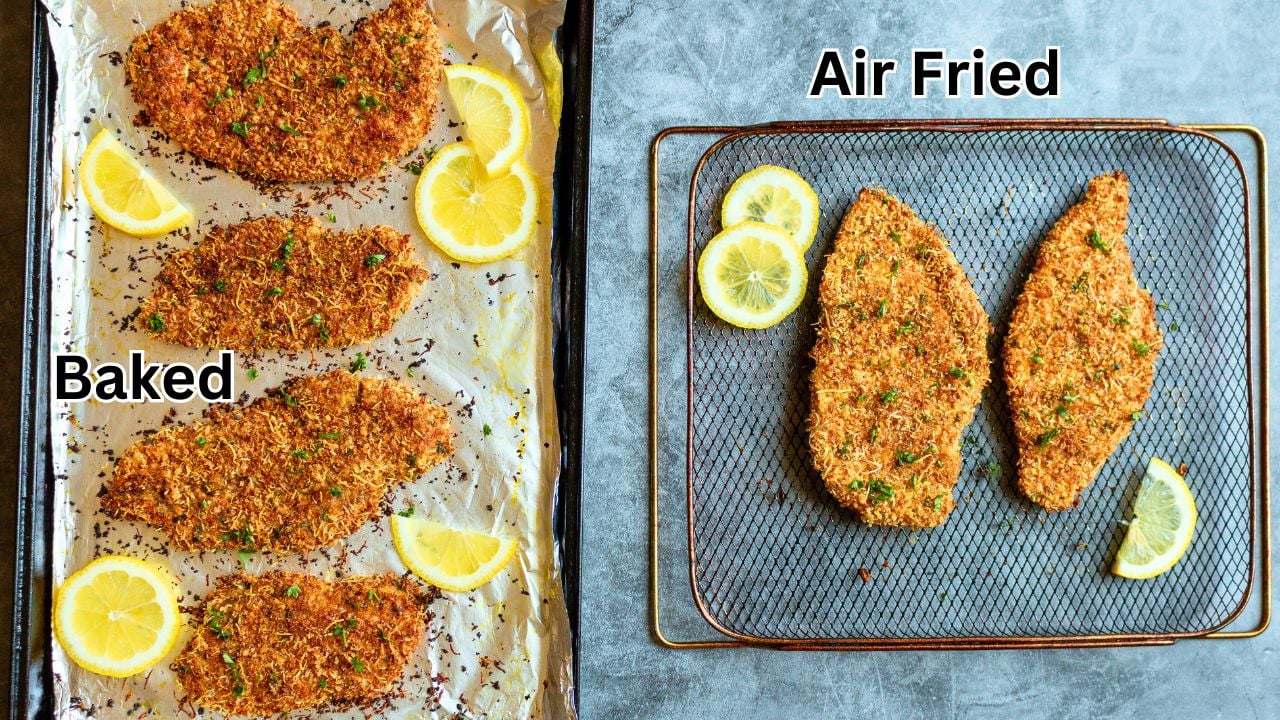
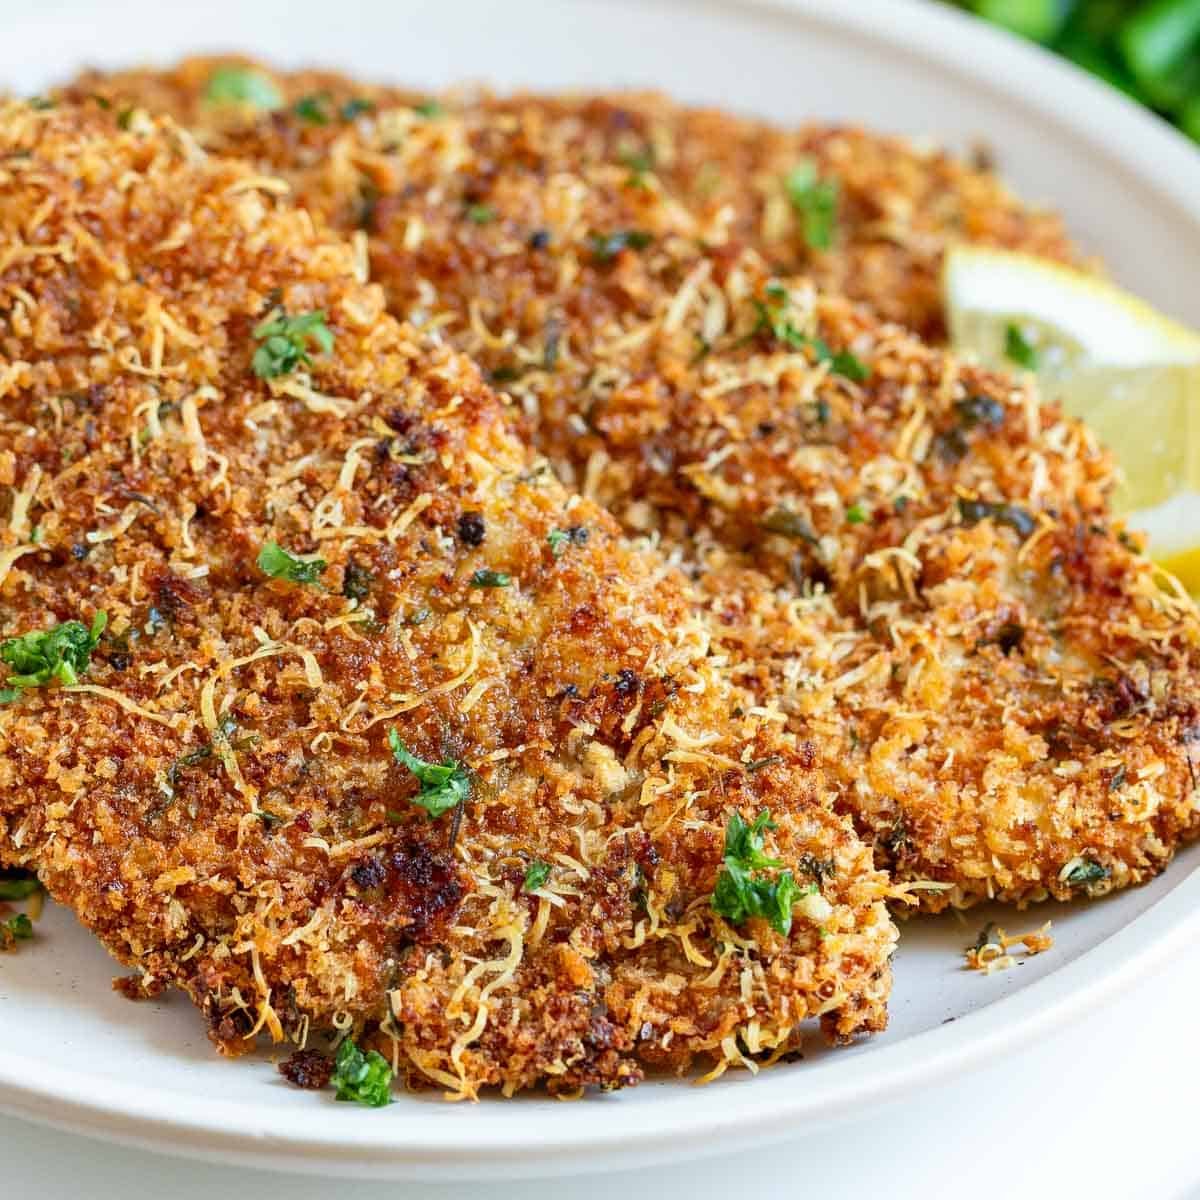
After recipe testing, both cooking methods made deliciously crispy Italian chicken cutlets with a tender and moist interior. Side by side, you could not tell the difference in texture or flavor. You will need to decide what cooking option suits your family best.
Pros: quick and easy. Only took 10 minutes to air fry. Super crispy exterior and tender inside.
Cons: To maintain that crispy exterior, you need to spray oil on both sides and flip over in the air fryer basket. We have a Cosori Smart 12-in-1 Air Fryer Toaster Oven. Therefore, we placed a lined baking tray under the air fry basket to catch the crumbs, but I still made a mess flipping them over. Probably you will not have the same problem but wanted to let you know. In addition, we could only air fry 2 cutlets at a time.
Baking Method: Pros and Cons
Pros: Least messy and easy. No additional oil is required, other than lightly greasing the lined baking sheet. (You can even use parchment paper and avoid all the extra oil – if that option is available to you.) In addition, you can fit more chicken cutlets on a half baking sheet tray than in an air fryer. Super crispy exterior and tender inside, even without a wire rack.
Cons: You need to remember to flip the chicken cutlets over at the 15-minute mark. Air frying is cooler in the summer compared to baking.
Recipe Tip: If you need to cook for more than 2 people, you may want to opt for the baked method. On the other hand, cooking just for 2 people, try the air fryer option.
What to Serve with Chicken Cutlets?
For a cozy Italian night in, try serving this chicken recipe with a side of risotto, spaghetti, mashed potatoes, or even a homemade Trofie pasta.
Keep it light with a side of summer millet salad, tossed green salad with a white balsamic vinaigrette or grilled vegetables.
Healthy World Cuisine first published this Italian chicken cutlet recipe on June 5, 2013. Wow, tabletop air fryers were not even invented back then. We updated the recipe with new methods, photos, videos, recipe card, and the works.
More Easy Chicken Recipes
Did You Like Our Recipe? Leave a ⭐⭐⭐⭐⭐ rating and/or a review in the comments section below. Your feedback is always appreciated! Follow us for more delicious recipes on Pinterest, Instagram, Twitter and Facebook! Don't forget to sign up for our email list for more free recipes.
Italian Chicken Cutlets (Oven Baked or Air Fried)
Equipment
- oven or air fryer
- meat mallet or heavy flat bottomed frying pan
Ingredients
Toasted Panko Breadcrumbs
- 1.5 cups panko breadcrumbs plain (sometimes also called Japanese breadcrumbs)
- 1 tablespoon olive oil
Chicken Cutlets
- 3 chicken breasts or 6 chicken cutlets or about 1.5 pounds depending on the size.
- salt and pepper to taste
- ½ cup all purpose flour or gluten free alternative to coat the chicken cutlets
Panko Breadcrumb Mixture
- toasted panko bread crumbs from above
- ¾ cup parmesan cheese finely grated
- 1 teaspoon Italian seasoning dried herb blend (mixture of basil, oregano, rosemary, marjoram, and thyme)
- 1 teaspoon garlic powder dried or 3 cloves of fresh peeled and minced garlic
- 2 tablespoons parsley fresh finely chopped or 2 teaspoons dried +extra for garnish.
- salt and pepper to taste
Egg mixture
- 2 whole eggs beaten
- ¼ cup parmesan cheese finely grated
- salt and pepper to taste
Instructions
- Decide if you want to BAKE or AIR FRY the chicken cutlets. If baking, preheat oven to 400° F (204°C) now. For air frying, you will preheat the air fryer to 400° F (204°C) approximately 5 minutes before air frying.
Toast the Panko Breadcrumbs
- Place panko breadcrumbs and olive oil into medium skillet and toast for about 5 minutes or until golden brown. Then transfer to a large plate or sheet pan to cool.
Prepare the Chicken Cutlets
- Cut the chicken breasts carefully in half lengthwise or butterfly them open. Then, cut in half lengthwise. Now you should have 6 chicken cutlets (If you have purchased chicken cutlets, you can skip this step)
- Pound chicken cutlets with a meat mallet or a heavy flat bottomed skillet to flatten to about ¼ inch thickness.
- Season both sides of the chicken cutlets well. Set it aside.
Set Up Breading Station
- Prepare Panko Breadcrumb Mixture: Mix ¾ cup of grated parmesan cheese, Italian seasoning, garlic powder, parsley, and salt and pepper into the cooled toasted panko breadcrumbs.
- Prepare Egg Mixture: Beat eggs and add the rest of the parmesan cheese (¼ cup) and salt and pepper.
- Place ½ cup all purpose flour on a large flat plate.
- Set up your breading station like the Ford Assembly line. First, place your prepared chicken cutlets Next, place your plate of flour. In third place, set your egg mixture. Finally, place your seasoned panko bread crumbs.
Assemble Chicken Cutlets
- Dip the seasoned chicken cutlets into the flour and shake lightly to remove excess flour.
- Next, dip the floured chicken piece into the egg mixture to coat both sides.
- Transfer the coated chicken onto the plate of seasoned toasted breadcrumbs. Coat both sides and press lightly to ensure the breading sticks to the chicken.
Baking Instructions: Preheat 400° F (204°C)
- Place prepared cutlets on a lined and lightly greased baking sheet and bake uncovered for 15 minutes. Then, turn over and continue baking for another 5 to 10 minutes or until the chicken has reached the internal temperature of 165°F (73.9°C). Cooking time will vary depending on how thin your cutlets are.
Air Frying Instructions: Preheat 400° F (204°C)
- Place chicken cutlets in the lightly greased air fryer basket and spray with oil. Air fry for 5 minutes. Then flip the chicken over and spray the other side with oil. Continue to air fry for another 5 to 7 minutes (total of 10 - 12 minutes) or until the chicken has reached the internal temperature of 165°F (73.9°C). Cooking time will vary depending on how thin your cutlets are.
Serving
- Enjoy while hot! We like to sprinkle the cutlets with a extra fresh parsley and fresh lemon juice.
Storage and Reheating
- Leftovers can be stored in a covered container in the refrigerator for 3 days or in the freezer for up to 2 months.
- Reheating Methods:Oven - 350° F (176° C) and place on a wire rack in your oven uncovered for about 15 minutes or until crispy. Air Fryer - 350° F (176° C) for about 3 to 5 minutes.Pan Fry - not one of our favorite methods but add a little oil in a skillet and over medium heat until crisp and warm.Microwave - not the best option as this will make the panko bread crumbs soggy. But if you must, them cover lightly and microwave for 30 seconds to 1 minute until warm.
Video
Notes
- If using previously frozen chicken, make sure it is completely thawed and dried well before breading or it will be soggy.
- Season the chicken cutlets, egg mixture and the panko bread mixture thoroughly for the best tasting breaded chicken.
- Set up your breading station like the Ford assembly line! First goes the chicken, then the flour, followed by the egg mixture and then the panko bread crumb mixture. Lastly, have your lined baking tray or prepared air fryer basket ready at the end.
- Use a fork to bread the chicken or use one hand for breading and keep the other hand clean.
- Shake off the excess flour so that the egg and panko breadcrumbs adhere well to the chicken.
- After dipping the chicken into the panko breadcrumb mixture, press down firmly on both sides so the breadcrumb mixture adheres to the chicken cutlet.
- The goal is to pound the chicken to a ½ inch thickness all around the cutlet to make sure it cooks evenly.
- Don’t overcook the chicken! You do not have to worry about the panko breadcrumbs getting browned or crispy because you already completed this task on the stove top. The goal is to have a moist chicken cutlet with an internal temperature of 165°F (73.9°C).




Anne ~ Uni Homemaker says
I love easy chicken recipes and this looks delicious Bobbi! Happy 87th Birthday to your Mom! Don't you just love recipes from your childhood? Brings back comfort and good memories. Great post!
GourmetGetaways says
What a beautiful story! Your wonderful
Mum obviously has a warm heart to nurture so many with her food.
All the ingredients you mentioned I have growing in my garden! I love Italian food for that reason, it is the food from the garden, I can't wait to try your dish 🙂
Raymund says
That looks like a perfect dinner, Yummy!
Mich Piece of Cake says
This chicken dish with tomatoes and basil look amazing!
ashley says
Sometimes I like the complex flavors and ingredients of Asian dishes, but I agree that sometimes it's nice to get back to the basics!! Looks delicious!!
Choc Chip Uru says
Such fresh and delicious ingredients 🙂
Your must love this so much!
Cheers
Choc Chip Uru
Carolyn Chan says
Looks delicious Bam ! Happy birthday to your mum !
Eha says
Your plate looked so appetizing way before I got to the recipe! Happy birthday to your Mom and I promptly thought of Chgo John and his Zia and their recipes too: I see he has already commented 🙂 ! As I also automatically turn to all my beloved Asian recipes these days when creating my menus, it truly is time to go back to simple and fabulously tasty of the days of yore 🙂 ! Methinks a large part of the taste and goodness then and now came from the fact that the chicken was organic, the tomatoes and basil probably homegrown and the dish put togther with love and understanding: shall make for sure 🙂 ! Real food!!
Healthy World Cuisine says
Hello Eha, I hope you are having a splendid week. I will pass on your birthday wishes to my mum, thanks. I was thinking of John and Zia when I posted this recipe too. It is so fun to see how similar our families backgrounds are, it really is a small world. I am so delighted that our love for food can bring us all together. Happy cooking! Take care, BAM
Korena in the Kitchen says
Another wonderful recipe Bam! This looks excellent and I enjoyed reading about the memories that came along with this dish 🙂
Preety says
your pics looks so tempting..
Paula @ Vintage Kitchen Notes says
I love everything italian, and the food first of all. I grew up eating it, and it still has a flavor that you don´t find anywhere else. I can only imagine this dish with sweet tomatoes and your own basil! Your own garlic plant, that´s awesome, ducks and all.
Bluejellybeans says
It looks delicious! So juicy... 🙂
nancyc says
That looks like a great recipe! That's great that your mom celebrated her 87th birthday! Hope you get to see her soon!
Healthy World Cuisine says
Thank you Nancy. I also hope that I can see my parents soon. It is so very difficult living so far away from the one's you love. Take care, BAM
ChgoJohn says
Buona Sera, BAM! Your Mom, Zia, and my Mom were of the same generation and the Great Depression really affected them. To this day, Zia uses remarkably few spices when cooking, though baking is another matter. This dish is certainly something that would easily fit into the Bartolini playbook and your photos could not be more appealing. Of course, serving it with either polenta or pasta on the side would complete the meal for me. I would be one very happy diner. Have a great week, BAM!
Healthy World Cuisine says
Buona Sera John, It is amazing how similar our backgrounds are and also have family with similar experiences. I am so glad our love for food has brought our families together via the internet. It really is a small world. Are you recovering from your food coma after your visit with Zia? I am glad to hear you had a lovely visit. Take Care, BAM
Conor Bofin says
Very nice BAM. Lovely colours.