Our homemade Whole Wheat Herb Focaccia Bread has loads of nooks, crannies and fun toppings. The perfect culinary solution for back to school lunches and snacks. (Video and Step By Step Instruction Included)
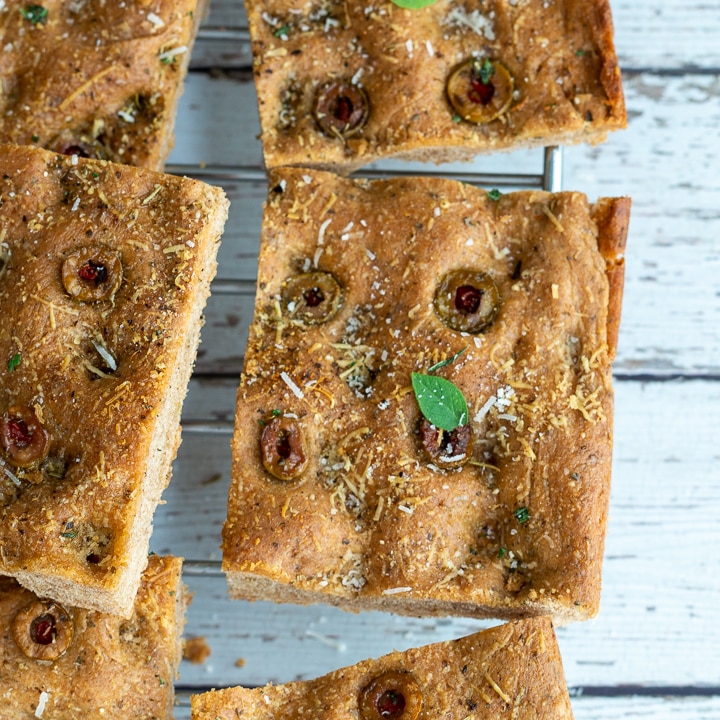
This easy homemade Italian bread recipe can solve a lot of problems. Focaccia is a great tool for lapping up gravy from our Tuscan Slow Cooked Beef in Wine Sauce. Delicious side to our Instant Pot Italian Sausage Tortellini Soup and makes one hearty sandwich. However, one of our favorite ways to enjoy this bread is as a snack with a delicious herb oil.
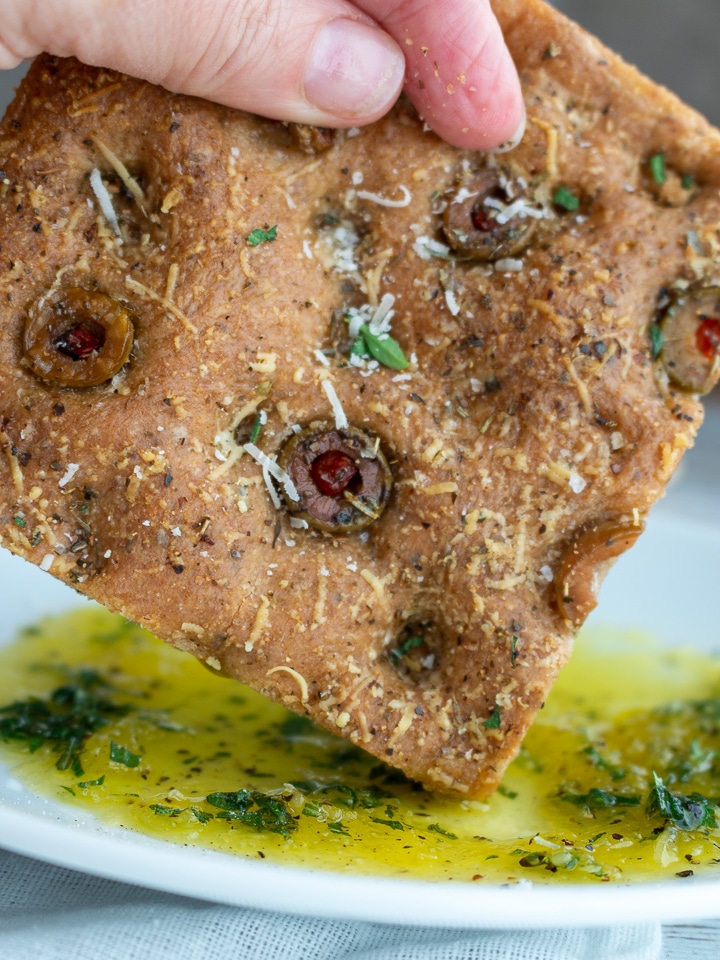
Whole Wheat Herb Focaccia Bread for the win!
Are you ready to get baking? Fall (Autumn) is just around the corner. Can you believe it? There is nothing like homemade fresh baked bread along with soup season, stews, chili and curries.
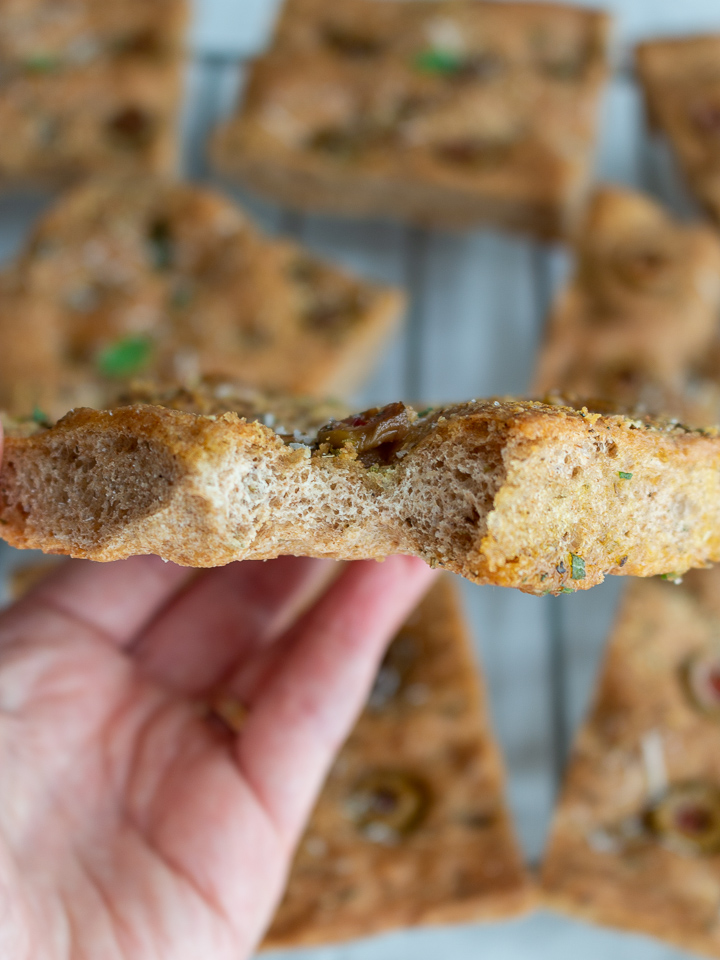
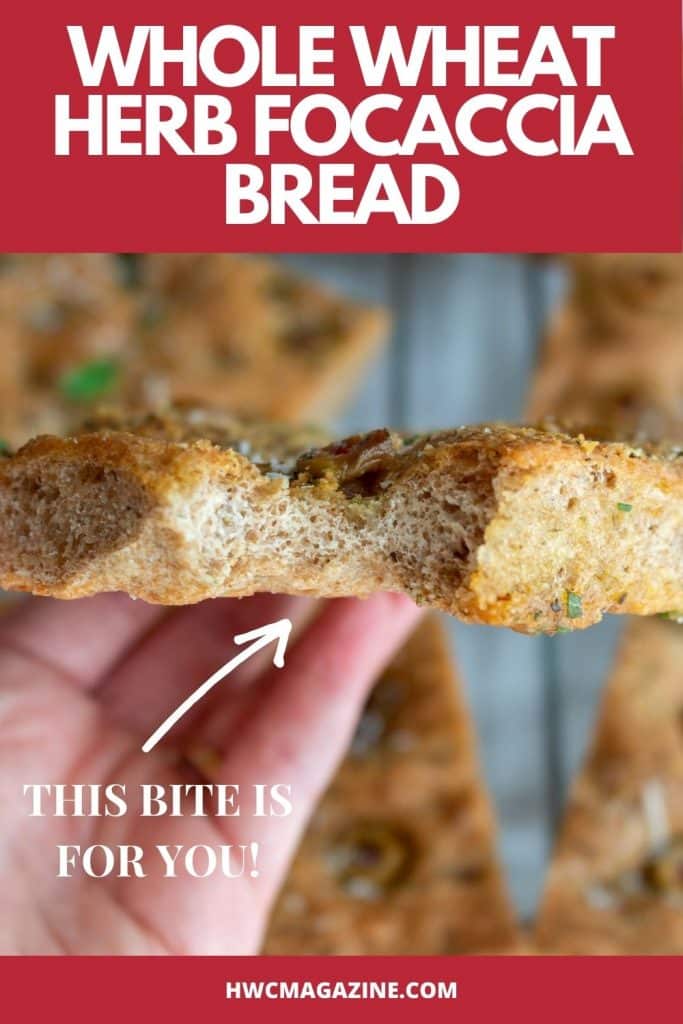
However, this is not your ever day normal homemade boring bread. It’s focaccia bread. The little dimples on the bread make the perfect little crevasse to hold all of the flavors and toppings. When you sink your teeth into this bread, you can feel the little crispness on the outside, chewy interior and taste the flavors of the toppings. Winner!
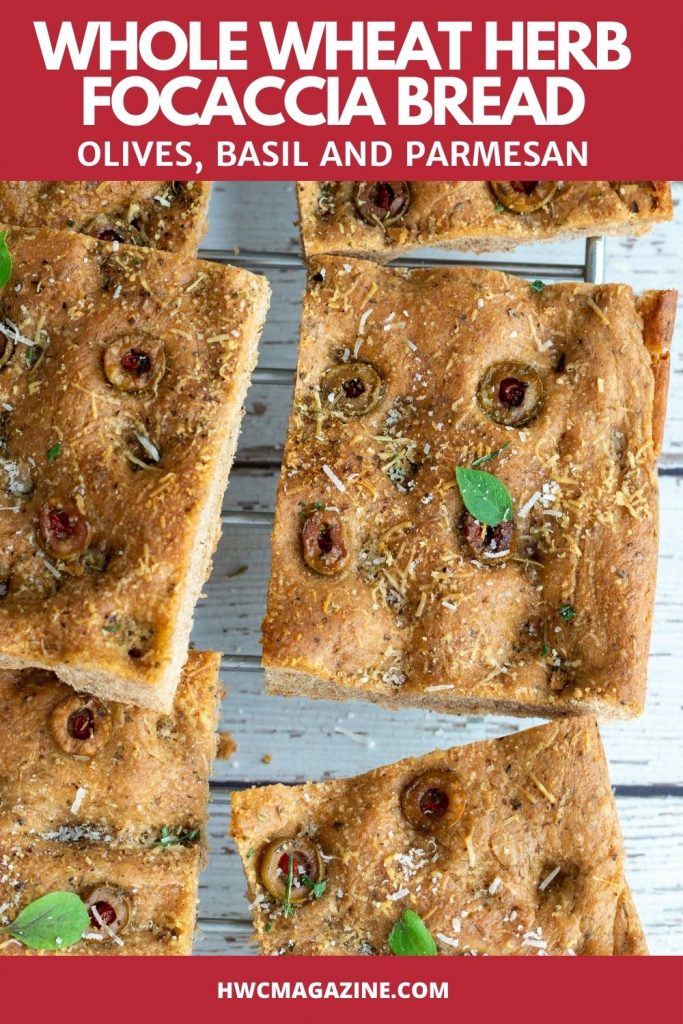
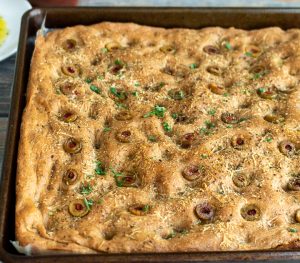
This no fuss easy focaccia is topped with extra virgin olive oil (EVOO), fresh basil, rosemary, garlic, sea salt, parmesan cheese and even olives. In addition, we added some dried Italian herbs directly into the whole wheat bread mix. This homemade bread is flavorful, not just on the top, but through and through.
Back to School Lunch Box Idea
Getting everyone and everything ready for the “back to school madness” can be daunting.
Whether your kids are studying online at home or back to school, there is one very similar issue. Household craziness! After, several months summer fun with no set schedules, it is time to get back to business.
Lunch Box Idea: In the morning before school, we slice the focaccia bread lengthwise in half and add some of their favorite fillings like grilled chicken, or ham and cheese. Then, we place it in the indoor grill plate for about 2 minutes. The sandwich has beautiful grill marks, the cheese is melted, and it is toasty hot. We wrap the sandwiches in aluminum foil and send the lunches off with some fruit, sliced veggies and the boys are good to go.
We don’t know if the sandwiches actually make it all the way until lunch time. However, we do know they must love them all that comes back him is an empty lunch sack with a ball of aluminum foil. These little toasted sandwiches are very similar to a panini sandwich. If you a looking for a Dagwood sized sandwich, be sure to try our Triple Decker Sammie.
After School Snack and Appetizer Idea
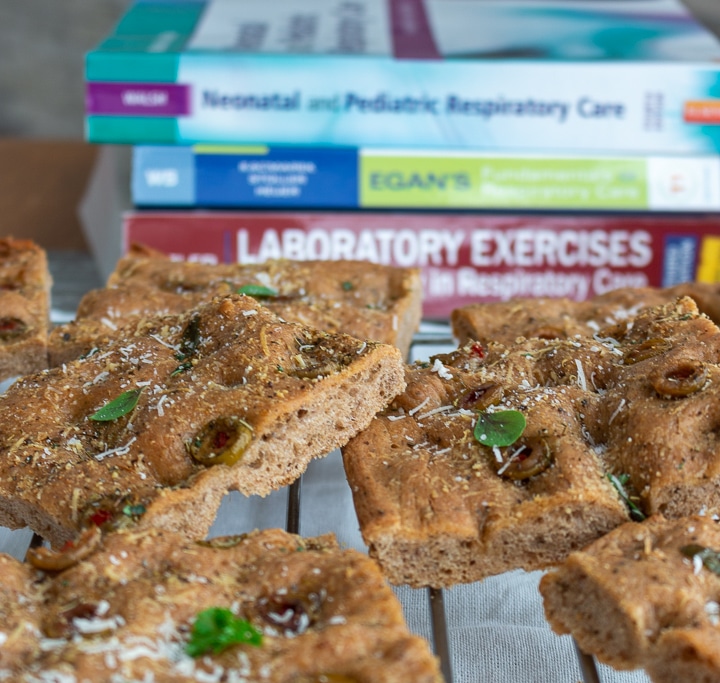
Don’t you just love bread hot out of the oven? Your house or apartment is going to smell amazing. However, there is one small complication. Because of all of these delicious aromas wafting from your kitchen, you are going to be hunted. Family and friends will be waiting like a cat waiting to pounce on its prey as soon as you to open the oven door.
You are going to have to fight off the crowds for your fair share of this delicious herb and cheesy bread. Whole Wheat Herb Focaccia Bread is one of THE most delicious after school snacks or appetizers, especially when served with our homemade herb oil.
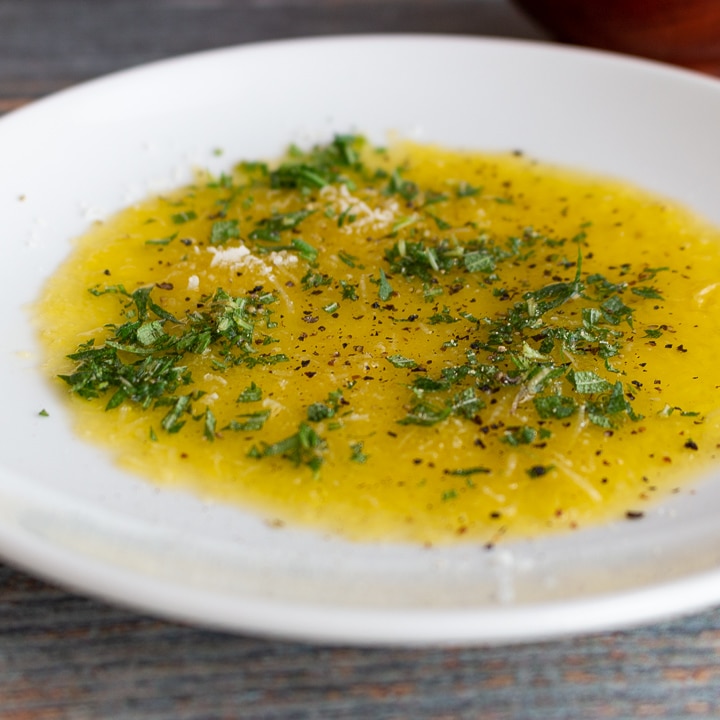
How to Make Herb Oil
You only need 4 ingredients. There is no need to measure the ingredients and it can be made in less than 5 minutes.
Extra virgin olive oil (EVOO)
Chopped fresh rosemary (or dried)
Parmesan cheese
Freshly grated pepper
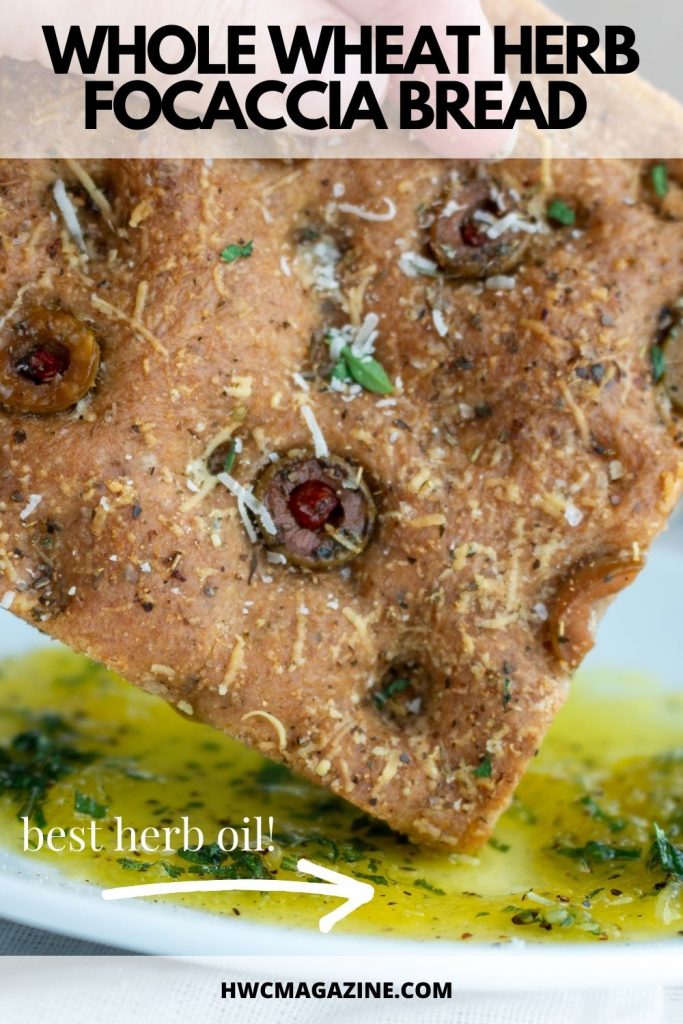
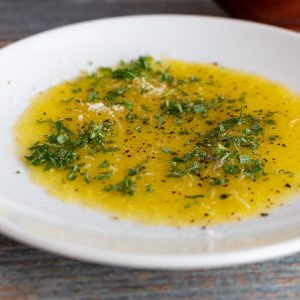
Get a flat salad sized plate and add a nice layer of EVOO to cover the bottom of the plate. Next add a thin layer of grated parmesan cheese, chopped rosemary and a sprinkle of fresh cracked pepper. Then, take a nice slice of that delicious hot out of the oven herb focaccia bread and dip it in the HERB OIL. Be generous with your slathering of oil and enjoy. You are going to forget all about boring butter.
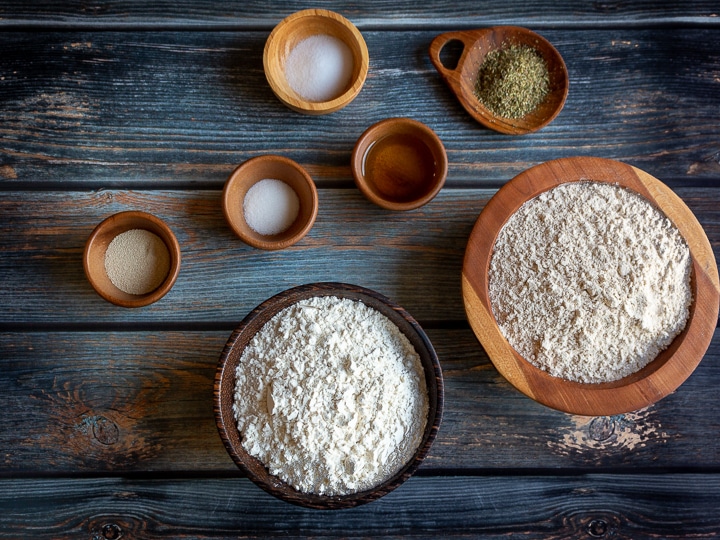
Dough Ingredients
Italian Cuisine is built on the concept of just a few ingredients but make sure you use quality ingredients. We used really good EVOO and this makes all the difference. A mix of whole wheat and all-purpose flour give a nice chewy texture to this bread. Make sure your yeast is not expired.
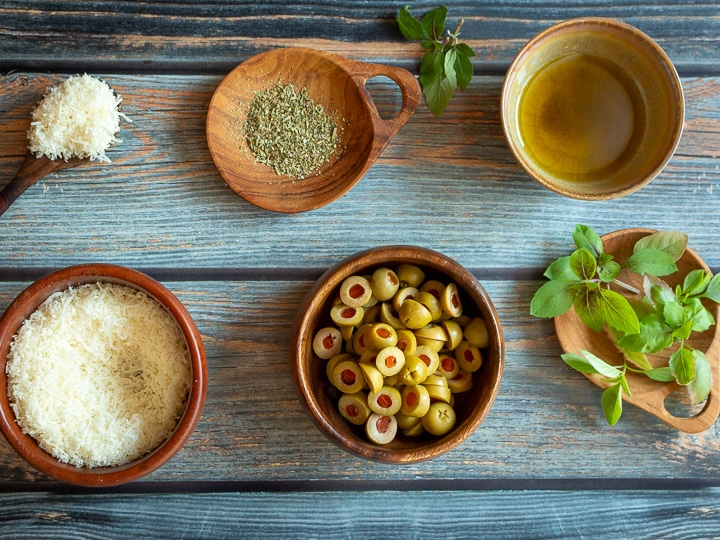
Focaccia Bread Art
Have you heard of this concept? We think this is plot by Martha Stewart to make working parents feel like underachievers. (smiling) Hey, we are feeling pretty artsy. We put olives and basil on the bread in a rather symmetrical way and did not even burn the bread. Feeling like a rock star over here.
However, if you are ever so inclined, you can decorate your focaccia bread with vegetables like peppers, tomatoes and zucchini. You can use edible flowers and make pretty designs or art deco into the focaccia dough. Don’t hold back! Maybe, you want to do a little focaccia bread art just like the ceiling in the Doumo of Florence. Knock yourself out!
How to Make Focaccia Bread from Scratch
- Activate yeast in water with sugar
- Mix dry ingredients
- Mix the wet ingredients in with the dry ingredients and extra virgin olive oil.
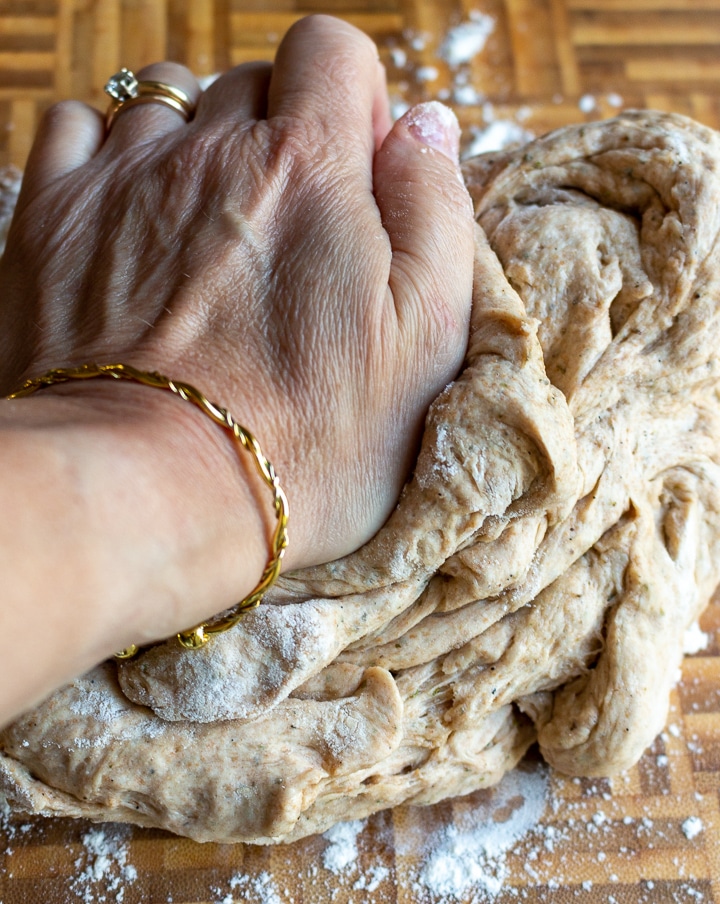
- Knead
- Let rise
- Shape into a rectangle in a sheet pan
- Rest for 30 minutes
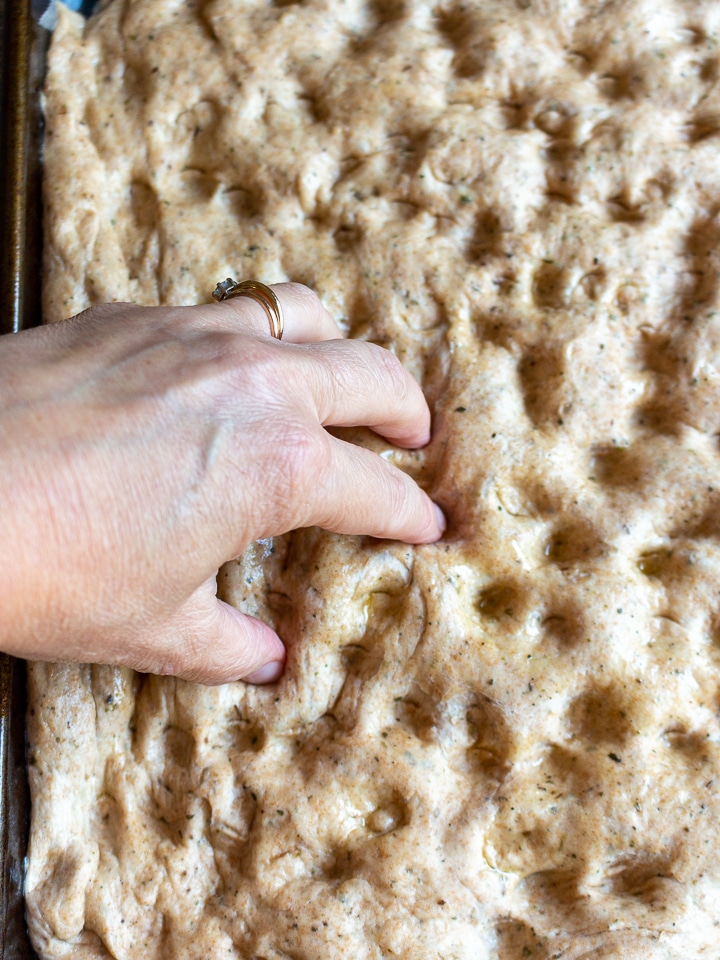
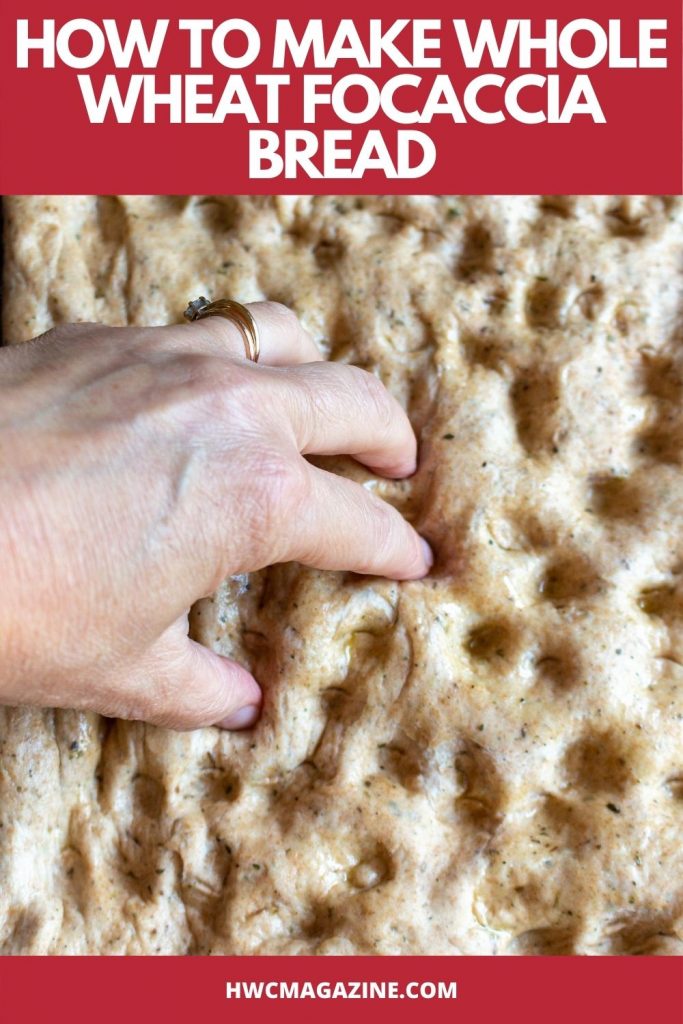
- Poke the bread with fingers
- Add fun toppings
- Bake
- Enjoy!
Best Bread Making Secrets
- Don’t use expired yeast
- Use Active dry Yeast and not Rapid rise yeast for this recipe.
- Make sure the water you add to the yeast is between 95 degrees F to 110 degrees F. If it is hotter, it can kill the yeast. If it is not warm enough, the yeast will not activate. We can never tell if the water is the right temperature by touching it, so we use a candy thermometer to validate.
- Adding sugar, helps activate the yeast in the water.
- You can use either a dough mixer with a dough hook to make the focaccia bread or use a fork and your hands to combine and knead.
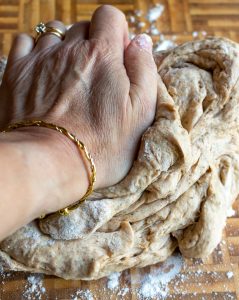
- Kneading the bread is an important step to activate the glutens in the bread.
- Bread loves to rise in a warm location. Sometimes, we turn the oven on to 375 degrees or 190 degrees and crack the oven open in the kitchen and this helps our bread rise. However, do not put your bread in direct sunlight outside to get it warm. Otherwise, it will form an odd crust on top. Been there – tried that. Not recommended.


Frequent Asked Questions (FAQ’s)
All those nooks and crannies make a delicious reservoir for toppings on our Whole Wheat Herb Focaccia Bread. Some of our favorites are…
Olive oil
Parmesan cheese
Rosemary, basil and other fresh herbs
Italian dried herbs
Garlic powder
Sea salt
Olives – any kind pitted
425 degrees F or 218 degrees C
Yes, you certainly can. Use a fork in the bowl to mix the ingredients together until the dough gathers. Then, on a floured surface, knead the dough for 5 minutes to activate the glutens.
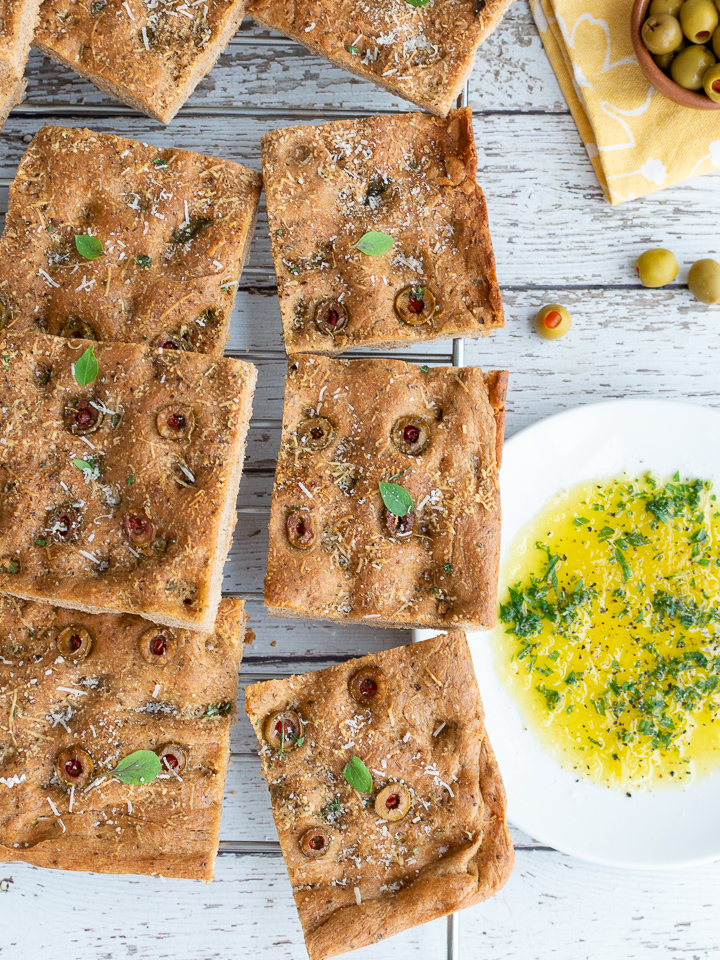
This whole wheat herb focaccia bread is a perfect accompaniment to so many different dishes such as salads, Italian dishes, and soups. The youngest boy has already brought home the first cold of the year. I told him to stop kissing all those cute little girls in his class but he must have not listened, so I made a big pot of my Immune Boosting Chicken and Rice Soup to go along with this delicious focaccia.
More Bread Recipes
Sesame Low Carb Cloud Bread - keto friendly bread
Gluten-Free Herbs de Provence - gluten free
Hong Zao Bread - lightly sweet bread
Hungry For More? Subscribe to our Newsletter and follow along on Facebook, You Tube, Instagram, and Pinterest for all the latest updates.
Whole Wheat Herb Focaccia Bread
Equipment
- baking tray
Ingredients
- 2.25 teaspoon yeast dry active (do not use rapid rise yeast) - 2 and ¼ teaspoon
- 1 teaspoon sugar
- 1.5 cups water warm (about 95-110 degrees F)
- 2 tbsps olive oil
- 2 cups whole wheat flour
- 1 and ¾ cup white flour all purpose unbleached (and a little extra for kneading)
- 1 and ¾ teaspoon salt
- 1 tablespoon Italian Seasoning or a mixture of basil, oregano, thyme
Toppings
- 2 tbsps olive oil EVOO
- sea salt to taste to sprinkle on top (optional)
- basil leaves handful of fresh leaves ( or rosemary, thyme, roasted garlic or any herbs your little heart desires)-optional
- ½ cup olives kalmata, green with pimentos, or whatever you have on hand-optional
- ½ cup parmesan cheese grated-optional
Herb Oil
- ½ cup olive oil Extra virgin
- 3 tablespoon parmesan cheese grated
- 1 tablespoon rosemary fresh chopped
- ¼ teaspoon pepper fresh cracked (to taste)
Instructions
- In a small bowl, dissolve the yeast and sugar in the warm water 95 - 110 degrees F or (35 degrees C to 43 degrees C). Wait for about 5 minutes until the yeast has time to start bubbling away. In a large bowl, combine the whole-wheat flour, all-purpose flour, salt and Italian dried herbs and mix together. Add olive oil to the flour mixture and slowly add the yeast mixture into the flour mixture a little at a time until the dough comes together. I do not have one of those fancy dough mixers so just used a fork and then my hands to get the dough to come together and it worked just fine. The dough should eventually form a ball and it will be slightly sticky. If too sticky add a little more all purpose white flour. The dough should not be stiff.
- Knead the dough on a floured surface for just about a minute and shape it into a ball. Clean, dry and grease your bowl and put the dough ball into the bowl covered tightly with plastic wrap for about 1.5-2 hours until doubled in size. (Bread loves to rise in a warm place so I usually turn on my oven and get it to temperature (about 190 degrees Celsius and then crack open the oven just a tad and turn off the oven, your bread might rise a little faster this way)
- Preheat your oven to 425 degrees F (218 degrees C).
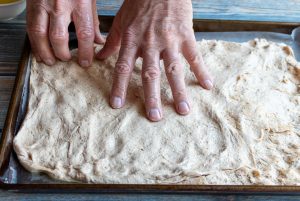
- Line a baking sheet with parchment paper and coat with olive oil. Place the dough ball in the centre of the baking pan and press it out with your fingers until you shape it into a rectangle. Give it some time, because of the gluten in the bread, it wants to constrict. Slowly press down and out and eventually the dough will relax enough and take the shape of the pan. (My boys loved helping out with this part of the bread making process as it is quite fun and they love working dough with their hands) Cover with a damp tea cloth and let rest for 30 minutes.
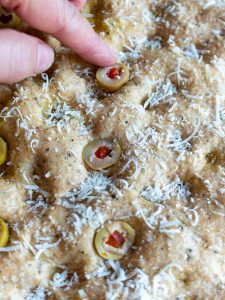
- Now comes the fun part. Lather your hands with extra olive oil (about 2 tablespoons) and rub over the top of the bread. Now using the tip of your fingers press down firmly and dimple the bread so that you get all those lovely nooks and crannies in the bread. Use your favorite toppings such as sea salt, fresh herbs such as basil, olives, parmesan cheese and sprinkle on top of your bread. (Some of the family are not entirely fond of olives. We made little sections with different toppings to suit the likes of each of the kids.)
- Bake for about 25 minutes or until a deep golden brown. Serve warm with your favourite meals. Or you can allow the bread to cool completely and cut into large squares and then slice down through the centre of the bread and fill you with your favourite sandwich fixings and make yourself or your kids a great panini sandwich for their school lunches.
How to Make Herb Oil
- Get a flat salad sized plate and add a nice layer of EVOO to cover the bottom of the plate. Next add a thin layer of grated parmesan cheese, chopped rosemary and a sprinkle of fresh cracked pepper. Then, take a nice slice of that delicious hot out of the oven herb focaccia bread and dip it in the HERB OIL. Be generous with your slathering of oil and enjoy. You are going to forget all about boring butter.
- Enjoy!
Video
Notes
- Don’t use expired yeast
- Use Active dry Yeast and not Rapid rise yeast for this recipe.
- Make sure the water you add to the yeast is between 95 degrees F to 110 degrees F. If it is hotter, it can kill the yeast. If it is not warm enough, the yeast will not activate. We can never tell if the water is the right temperature by touching it, so we use a candy thermometer to validate.
- Adding sugar, helps activate the yeast in the water.
- You can use either a dough mixer with a dough hook to make the focaccia bread or use a fork and your hands to combine and knead.
- Kneading the bread is an important step to activate the glutens in the bread.
- Bread loves to rise in a warm location. Sometimes, we turn the oven on to 375 degrees or 190 degrees and crack the oven open in the kitchen and this helps our bread rise. However, do not put your bread in direct sunlight outside to get it warm. Otherwise, it will form an odd crust on top. Been there – tried that. Not recommended.




dedy oktavianus pardede says
This old school fokkasia(this is how we called foccaccia in Indonesia) is always win my hearth..
a little drizzle of truffle oil would make it tasty even more Bam, this is my kinda secret tricks....
Daniela says
This looks so,so good!
Wonderful way to celebrate back to school, and the olive oil dip is such a great idea,so Mediteranian.
Tonette Joyce says
mmmmm! Bobbi! Nice!
Mary Frances says
Mm, fall food. I love dipping in a good olive oil too.
Purabi Naha | Cosmopolitan Currymania says
Nothing beats like homemade bread! I love your foccacia...looks so perfect with those dimples and topped with olive oil, rosemary and olives. Your kids would have been so happy seeing this wonderful, home-baked bread!
http://www.cosmopolitancurrymania.com
Nami | Just One Cookbook says
This week I'm trying NOT to eat carbs (for the first time). And all the sudden I'm not too sure about my goal looking at this delicious foccacia bread. 😉 I am such a carb lover, this is irresistible!
Robyn says
Wow, I love that bread, Bobbi! All of my favourite ingredients together - perfect. I'm guessing those boys are the envy of their classmates with a lunch like that.
Hope you're having a great weekend.
Healthy World Cuisine says
Looking forward to keeping in touch with you and all of your travels and culinary experiences. We currently live in Hong Kong and have for several years, so if your travels take you to Asia again please give me a jingle. Take Care, BAM
Raymund says
Love them freshly baked dipped in olive oil. Mmmmmm
susartandfood says
BAM, what a great idea. I once bagged up snacks for the class and sent them off with my kids on the first day of school. It was apple inspired so pleased the teacher as well. They were all excited when they came home. Grade school, naturally, in high school they'd have been horrified to have been found standing next to their parents. I will try this. We eat a lot of focaccia.
thatskinnychickcanbake says
I'd love my sandwich on your lovely focaccia! Lucky boys!
Paula @ Vintage Kitchen Notes says
Your lunchbox intervention is just spot on! I might go back to school... no, not a chance there, lol! I'm grilling a lot indoors and need to try pizza. But focaccia is my first love, and this one is gorgeous!
veganmiam.com says
Thanks for stopping by blog! I look forward to reading more of your posts! Plus, did you live in Hong Kong- that's amazing?! Have a great weekend!
dianeskitchentable says
Unbelievable - do I have to go to school to have some of this? You really had me with all of the wonderful toppings but now you're killing me with that last picture of the dipping! I didn't kiss your son but I caught my first cold of the season too. Soup and some of this focaccia bread would certainly make me feel better.
veganmiam.com says
Awwwww, bento lunches are the best! How long did you live in Japan ^_^? The foccacia bread looks so gooooood, and perfect for grilled sandwiches or on its own with hummus or any kinds of bean dip!
Healthy World Cuisine says
Thank you for stopping by. We lived in Japan for only one year before the Tsunami, however I miss Yokohama, my dear friends and the culture. Our family quickly adapted to our new way of life in Japan and that meant getting up extra early to compete with all the other Japanese moms on making the coolest bento box lunches for school. Take Care, BAM